
RV Roof Replacement Cost: Materials, Labor and Quote Checklist
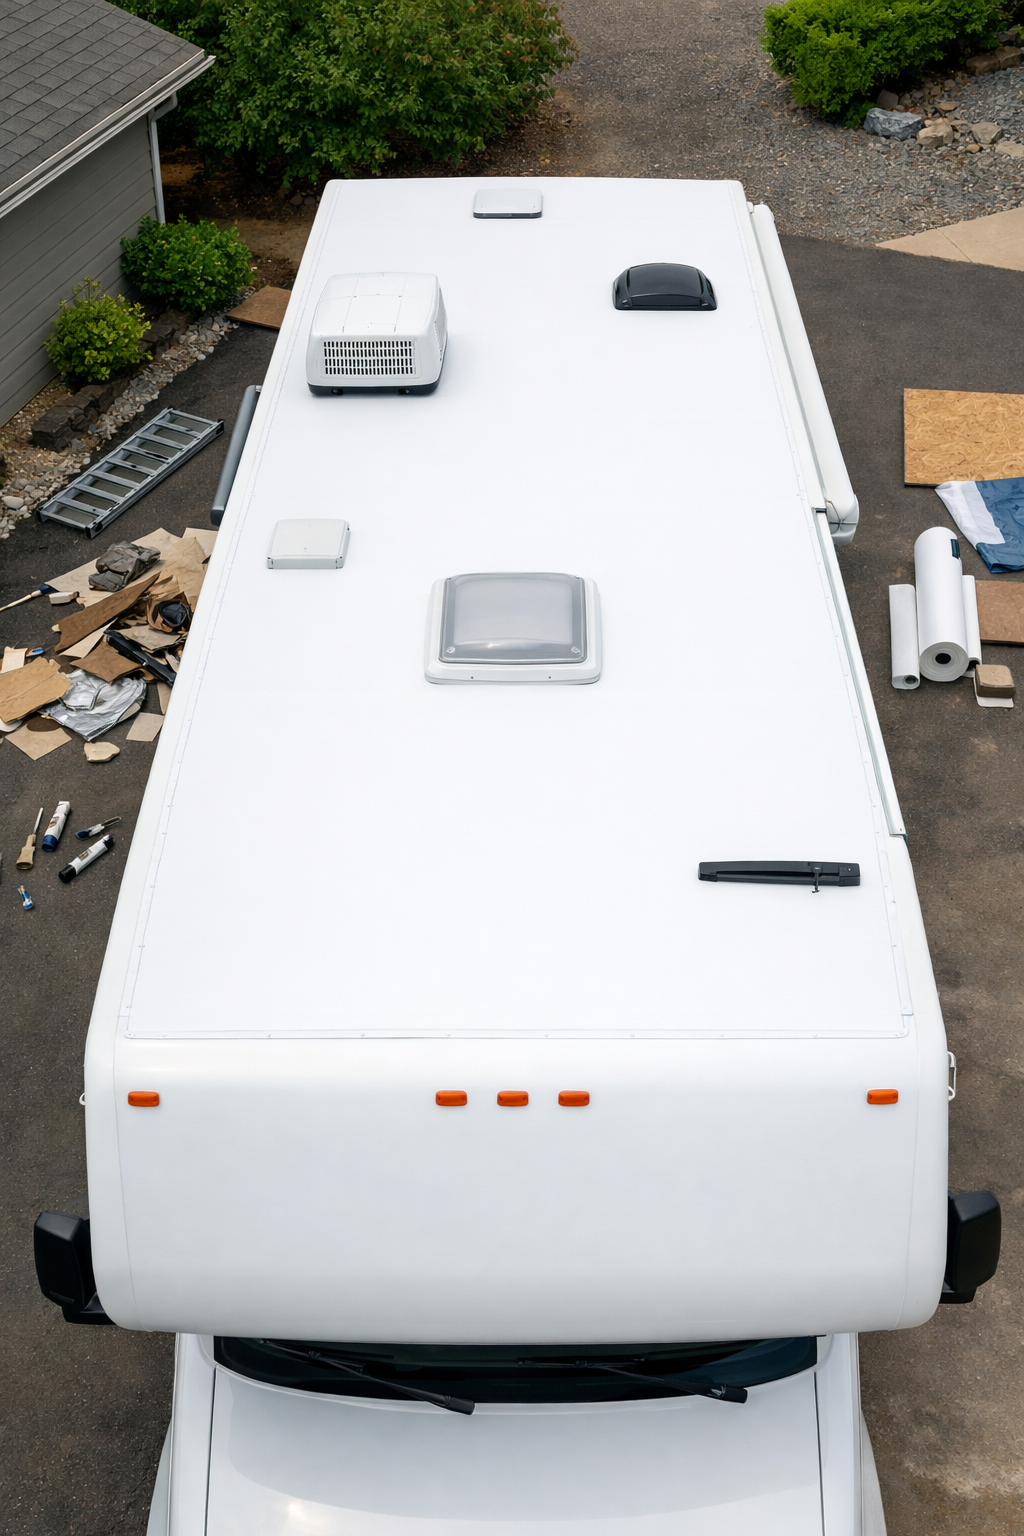
RV Roof Replacement: What Your Estimate Should Include
The cost to replace an RV roof depends on the roof size, membrane or roof system, labor and damage beneath the surface. A complete replacement can cost several thousand dollars; a membrane-only price is not an installed price. Start with an inspection and compare written estimates for the same scope of work.
Before requesting quotes, note your RV make, model, year, roof material, visible leaks and previous repairs. Ask each shop to separate materials, labor, fixture removal, disposal and any allowance for damaged decking.
The roof protects everything inside your RV from weather elements, making it crucial to maintain its integrity. Over time, exposure to sun, rain, snow, and temperature fluctuations causes wear and tear. Recognizing when replacement becomes necessary and knowing what factors influence pricing empowers you to plan ahead and avoid emergency situations that could lead to interior damage.
What Is RV Roof Replacement
RV roof replacement involves removing the existing roofing material and installing a new protective layer on top of your recreational vehicle. This process differs significantly from residential roofing because RVs use specialized lightweight materials designed for mobile structures. The cost to replace rv roof varies based on material selection, RV size, and whether you hire professionals or tackle the project yourself.
The replacement process typically includes removing old sealant, stripping damaged materials, inspecting the underlying structure for rot or damage, making necessary repairs to the substrate, and installing new roofing material with proper sealing. Unlike home roofs that might last decades, RV roofs generally require replacement every 10 to 20 years depending on material quality and maintenance practices.
Common roofing materials include:
TPO (Thermoplastic Polyolefin): Durable, heat-reflective, and increasingly popular for its longevity
EPDM (Rubber): Affordable, flexible, and widely used across the RV industry
Fiberglass: Rigid, low-maintenance, and excellent for preventing leaks
Aluminum: Extremely durable but heavier and more expensive than alternatives
How To Determine If You Need RV Roof Replacement
Have persistent leaks, tears, soft or sagging areas and interior water stains assessed by an RV service technician. The inspection should distinguish a repairable surface problem from damage to the roof deck or structure.
Chalking or a bubble alone does not prove that a complete replacement is necessary. Dicor’s EPDM guidance describes normal oxidation and explains that some membrane bubbles occur with changing conditions. These observations are product-specific; ask the manufacturer about your roof system.
Record the location of leaks and previous repairs before requesting estimates. Follow the RV maker’s access and maintenance instructions, and do not step onto an area that may be weakened by water damage.
How To Find Professional RV Roof Replacement Services
Locating qualified professionals requires research and due diligence. Start by contacting RV dealerships in your area, as many offer service departments with experienced technicians. Specialized RV repair shops often provide more competitive pricing than dealerships while maintaining quality standards. Mobile RV repair services bring convenience by coming to your location, though they may charge premium rates.
Request multiple quotes to compare the cost to replace rv roof across different providers. Ensure quotes include detailed breakdowns of materials, labor, warranty coverage, and timeline estimates. Verify that contractors carry proper licensing, insurance, and bonding to protect yourself from liability. Check online reviews on platforms like Google, Yelp, and RV-specific forums where owners share experiences.
Ask potential contractors these essential questions:
How many RV roof replacements have you completed?
What materials do you recommend for my specific RV model?
Do you provide warranties on both materials and labor?
What is your estimated completion timeline?
Will you inspect and repair underlying structural damage if discovered?
Can you provide references from recent customers?
Do you handle old material disposal and cleanup?
Membership in industry organizations like RVIA (RV Industry Association) or RVDA (RV Dealers Association) demonstrates professionalism and commitment to industry standards. These affiliations often require adherence to ethical business practices and continuing education.
How To Buy Materials For RV Roof Replacement
Purchasing materials independently can reduce the overall cost to replace rv roof if you’re hiring labor separately or planning a DIY installation. Specialty RV supply stores stock roofing materials specifically designed for recreational vehicles, ensuring compatibility and proper performance. Online retailers like Amazon, Camping World, and etrailer.com offer competitive pricing with convenient delivery options.
Calculate material quantities accurately by measuring your RV’s roof dimensions carefully. Most roofs require additional material beyond exact measurements to account for overlaps, waste, and future repairs. Purchase sealants, adhesives, primers, and finishing materials from the same manufacturer as your roofing material to ensure chemical compatibility and warranty compliance.
Consider these factors when selecting materials:
Climate conditions where you primarily use your RV
Weight considerations affecting fuel efficiency and handling
Maintenance requirements for different material types
Expected lifespan and long-term cost effectiveness
Color options that may affect interior temperature regulation
Warranty coverage offered by manufacturers
Bulk purchasing through RV owner clubs or forums sometimes yields discounts. Connect with other owners planning similar projects to potentially share shipping costs or take advantage of volume pricing. The cost to replace rv roof decreases significantly when material expenses are minimized through strategic purchasing.
How Much Does It Cost To Replace An RV Roof
There is no single reliable price for every RV roof. Camping World explains that complete replacements can cost thousands of dollars, with additional work increasing the total. A small patch, a reseal, a new membrane and a structural rebuild are different jobs and should not be compared as equivalent quotes.
For a 30-foot travel trailer or any other RV, ask for separate prices for the following options and confirm what each includes:
EPDM materials: Confirm membrane dimensions, approved adhesive, sealant and delivery.
Installed EPDM system: Request the complete material and labor scope.
TPO materials: Price a compatible system for the specific RV and substrate.
Installed TPO system: Confirm removal, preparation, installation and finishing costs.
Fiberglass work: Clarify whether the quote covers surface repair or replacement of the roof assembly.
Aluminum roof work: Ask the shop to specify panel replacement, seams and underlying repairs.
Vehicle length alone is not enough to price the work. Ask the shop to record the roof dimensions, access needs and number of fixtures that must be removed and reinstalled. Hidden damage can change the scope after the old covering is removed.
Ask whether labor is a fixed price or an estimate based on hours. The written quote should identify the hourly rate where applicable, included tasks and the approval process for extra work.
Cost Of RV Roof Replacement
Compare the complete material package: membrane or panels, adhesive, sealant, edge details and accessories. Confirm quantities and whether prices are per square foot, linear foot, roll or kit. A low membrane price can exclude the products needed to install it.
Ask the shop to price removal and disposal separately from repairs to decking, framing and insulation. Have it explain how concealed damage will be documented and how you will approve additional charges before that work begins.
Additional cost factors include:
Geographic location affecting both material and labor rates
Roof complexity with multiple levels, skylights, or solar panels
Accessibility challenges requiring special equipment
Disposal fees for old roofing materials
Permit requirements in certain jurisdictions
Warranty upgrades for extended coverage
Seasonal demand fluctuations affecting pricing
The cost to replace rv roof also depends on timing. Scheduling during off-peak seasons (late fall through early spring) may yield discounts as shops compete for business. However, weather constraints limit installation windows in cold climates, potentially requiring indoor facilities that increase costs.

Camper Roof Repair Cost
A localized repair may be an option when the surrounding roof and substrate remain sound. Get the leak diagnosed before comparing a repair quote with a full replacement estimate. See our RV roof repair cost guide for the questions to ask about smaller repairs.
Resealing joints, coating a suitable membrane and replacing the roof are different scopes of work. Ask why the proposed treatment suits your roof and whether the estimate includes preparation and repairs beneath the surface.
Repair versus replacement decisions depend on:
Damage extent: Isolated problems favor repair; widespread deterioration requires replacement
Roof age: Roofs approaching end-of-life benefit more from replacement
Cost comparison: Compare the expected repair outcome, remaining roof condition and complete replacement scope; a fixed percentage alone is not a reliable decision rule
Future plans: Short-term RV ownership may justify temporary repairs
Leak frequency: Recurring problems despite repairs indicate systemic failure
For a leak during travel, ask the service provider about call-out charges, travel fees and after-hours rates. Use only temporary repair products approved for your roof material, and arrange an inspection if water may have reached the structure.
The cost to replace rv roof after delaying necessary repairs increases due to secondary damage. Water infiltration compromises insulation, rots wood framing, damages electrical systems, and promotes mold growth. Addressing problems promptly minimizes total expenses and preserves RV value.
Cost To Replace Rubber Roof On RV
For an EPDM replacement, request a quote for the complete system and confirm compatibility with your RV. Compare that quote with other approved options using the same repair scope, rather than assuming one membrane is always the cheapest choice.
Rubber roofing advantages include flexibility that accommodates RV movement and vibration, ease of installation suitable for DIY projects, excellent waterproofing properties, and lower weight compared to rigid alternatives. The material handles temperature extremes well and repairs easily when damaged. Manufacturers typically warranty rubber roofing for 10-12 years, though proper maintenance extends actual lifespan to 15-20 years.
DIY rubber roof installation follows this general process:
Remove all roof accessories, vents, and hardware
Strip old roofing material and clean the substrate thoroughly
Inspect decking for damage and make necessary repairs
Apply primer to ensure proper adhesion
Install new EPDM membrane using appropriate adhesive
Cut precise openings for roof penetrations
Seal all edges, seams, and penetrations with compatible sealant
Reinstall accessories and hardware with fresh sealant
Perform thorough water testing before use
Your materials list should identify the membrane, bonding adhesive, lap sealant, any required primer and cleaning products. For example, Dicor describes its EPDM roof as a system combining membrane, adhesive and lap sealant. Confirm which items your supplier’s kit actually contains.
How To Install RV Roof Replacement
DIY installation significantly reduces the cost to replace rv roof but requires careful planning, appropriate skills, and suitable weather conditions. Temperature affects adhesive performance, with most products requiring 50-90°F for proper bonding. Choose a dry period with favorable weather forecasts extending several days to allow adequate curing time.
Essential tools and materials include:
Roofing membrane appropriate for your RV size
Compatible adhesive or bonding agent
Lap sealant for seams and penetrations
Primer for substrate preparation
Utility knives with sharp blades
Measuring tape and straightedge
Rollers for adhesive application
Cleaning supplies and rags
Safety equipment including gloves and eye protection
Ladder and non-slip footwear
Begin by thoroughly cleaning the existing roof surface, removing all dirt, oxidation, and old sealant. This preparation step critically affects adhesion quality. Remove roof accessories systematically, labeling fasteners and components for proper reinstallation. Inspect the underlying structure carefully, addressing any soft spots, rot, or damage before proceeding.
Cut roofing material with 6-12 inches of overhang on all sides, allowing precise trimming after initial positioning. Follow manufacturer instructions exactly regarding adhesive application patterns and open times. Work systematically from one end to the other, eliminating air bubbles and ensuring complete contact. The cost to replace rv roof through DIY means requires patience and attention to detail for successful results.
Common mistakes include rushing the process, working in unsuitable weather, applying insufficient adhesive, neglecting proper surface preparation, and inadequately sealing penetrations. These errors compromise roof integrity and may necessitate premature replacement. If uncertain about your abilities, hiring professionals prevents costly mistakes.
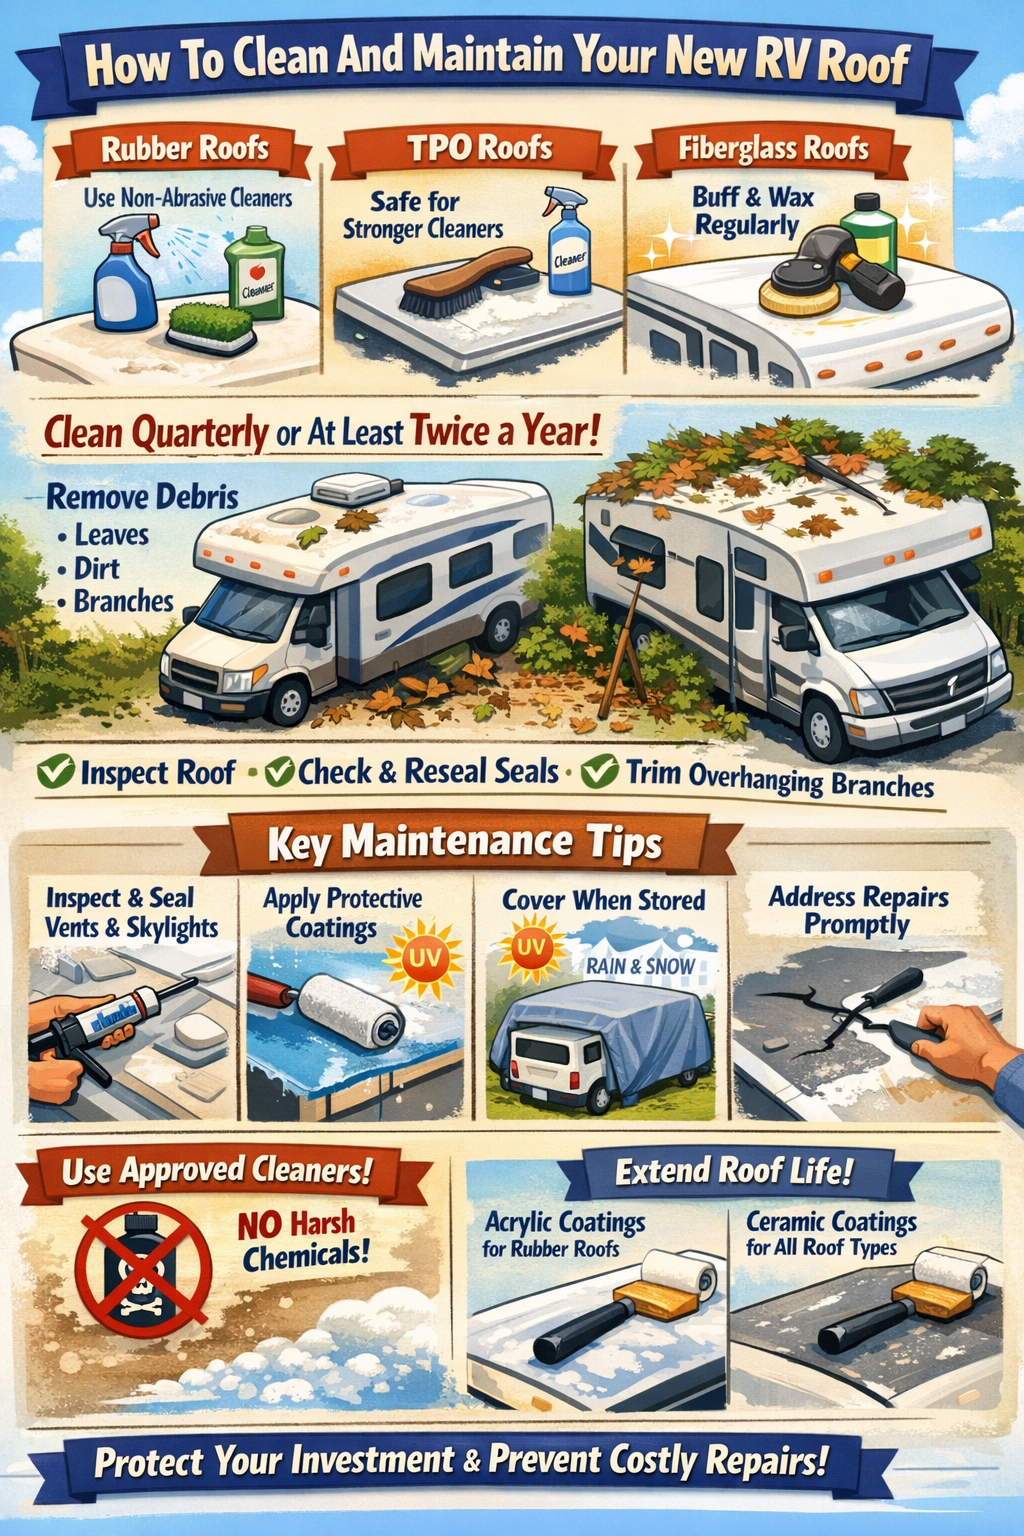
How To Clean And Maintain Your New RV Roof
Identify the roof membrane before choosing a cleaner, sealant or coating. Use the products and cleaning method approved for that system; do not assume TPO tolerates aggressive chemicals or that automotive wax is suitable for every fiberglass roof. Consult the Dicor care and maintenance resources if your roof uses a Dicor system.
Establish a regular cleaning schedule, ideally quarterly or at minimum twice yearly. Debris accumulation traps moisture, accelerates deterioration, and creates environments for mold and algae growth. Remove leaves, branches, and dirt promptly after travel or storms. Use soft-bristle brushes or microfiber mops to prevent surface scratching.
Recommended maintenance practices include:
Inspect the entire roof surface during each cleaning
Check all sealant lines for cracks, gaps, or deterioration
Clean and reseal roof penetrations annually
Apply protective coatings as recommended by manufacturers
Trim overhanging tree branches that could scratch or puncture roofing
Cover your RV when stored to minimize UV exposure
Address minor issues immediately before they escalate
Cleaning products matter significantly. Avoid petroleum-based cleaners, harsh solvents, or abrasive compounds that degrade roofing materials. Use manufacturer-approved cleaners or mild dish soap diluted in water. Rinse thoroughly after cleaning to remove all residue. The cost to replace rv roof increases when improper maintenance shortens material lifespan.
A coating must be approved for the existing roof material and condition. It does not replace inspection or repair of damaged decking. Ask the roof manufacturer whether recoating is appropriate and what preparation, coverage and curing conditions its product requires.
What Is The Cost Comparison: DIY Versus Professional Installation
DIY work removes a contractor’s labor charge but adds your time, tools, access equipment and responsibility for the installation. Compare the complete cost and warranty conditions before deciding. Structural damage or uncertainty about the roof system warrants an assessment by an experienced RV technician.
Professional installation advantages include expertise ensuring proper technique, warranty coverage protecting your investment, efficiency completing projects quickly, insurance coverage for accidents or damage, access to commercial-grade materials and tools, and structural inspection identifying hidden problems. These benefits justify higher costs for many owners, especially those lacking experience or physical ability to work on roofs safely.
DIY installation suits owners who:
Possess construction or roofing experience
Have adequate time for thorough project completion
Can work safely at heights
Own or can borrow necessary tools
Feel comfortable troubleshooting problems independently
Want maximum cost savings despite increased effort
Professional installation makes sense when:
The RV represents significant financial investment
Complex roof configurations involve multiple levels or features
You lack time or physical ability for DIY work
Warranty coverage provides peace of mind
Structural concerns require expert assessment
Calculate the true cost to replace rv roof by considering your time value. A project requiring 30-40 hours of labor represents substantial personal investment. If your time carries professional value, paying for installation might actually cost less when factoring in lost income or opportunities.
Advantages And Challenges Connected To Cost To Replace RV Roof
Understanding both benefits and difficulties associated with roof replacement helps set realistic expectations. The primary advantage is restoring complete weather protection, preventing thousands in potential water damage repairs. New roofs improve energy efficiency by enhancing insulation effectiveness, potentially reducing heating and cooling costs during travel. Modern materials offer improved durability compared to original equipment, extending intervals before future replacement becomes necessary.
Replacement provides opportunities to upgrade features. Installing solar panels, improving ventilation systems, or adding skylights integrates easily during roof replacement. The cost to replace rv roof includes preparing the surface to accept these additions without future modifications. Enhanced resale value represents another advantage, as buyers value recently replaced roofs and documentation of professional installation.
Financial challenges include the substantial upfront investment required. Many owners struggle to budget several thousand dollars for roof replacement, especially when unexpected. Timing difficulties arise because roof failure doesn’t wait for convenient financial situations. Emergency replacements during travel season cost more and create scheduling complications. Choosing between repair and replacement creates decision anxiety, especially when damage falls in the gray area where either option seems viable.
Technical challenges include:
Material selection confusion with numerous options and conflicting recommendations
Finding trustworthy contractors in unfamiliar areas during travel
Coordinating installation timing with usage plans
Dealing with warranty claims if problems develop
Understanding technical specifications and compatibility issues
The cost to replace rv roof varies so widely that researching and comparing options becomes overwhelming. Price shopping requires understanding what each quote includes and excluding, making apple-to-apple comparisons difficult. Hidden costs like structural repairs discovered during installation create budget uncertainty.
Frequently Asked Questions : Replace my RV roof
How often should I replace my RV roof?
There is no universal replacement interval. Use the roof manufacturer’s guidance, inspection findings and repair history to decide. A leak or a damaged seal does not automatically require a complete replacement; moisture damage beneath the membrane needs a separate assessment.
Can I install a different roofing material than original?
Yes, you can upgrade or change roofing materials during replacement. Ensure the new material is compatible with your RV’s structural capacity and weight limitations. Consult with professionals about substrate preparation requirements for different materials, as some need specialized underlayment or fastening systems.
Does insurance cover RV roof replacement?
Standard RV insurance typically covers roof damage from covered perils like accidents, storms, or vandalism but excludes wear and tear or maintenance issues. Review your policy carefully and document any storm damage thoroughly. Extended warranties may cover premature material failure within coverage periods.
What’s the best season for RV roof replacement?
Late spring through early fall offers ideal conditions with warm, dry weather promoting proper adhesive curing. Avoid winter installations in cold climates where temperature affects material flexibility and bonding. Summer provides longest daylight but extreme heat can make working conditions difficult.
How long does professional RV roof replacement take?
Most professional installations require 2-5 days depending on roof size, complexity, and weather conditions. Simple rubber replacements on travel trailers might complete in 1-2 days, while large motorhomes with fiberglass installation could take a week including preparation and curing time.
Should I repair or replace my aging RV roof?
Replace roofs approaching or exceeding manufacturer-recommended lifespan, showing widespread deterioration, or requiring frequent repairs. Repair makes sense for isolated damage on relatively new roofs, minor leaks caught early, or when selling soon and seeking minimal investment.
Do mobile RV roof repair services cost more?
Not necessarily. Ask for travel, call-out and after-hours fees and compare the same repair scope with a shop estimate. Mobile service may also be limited by access, shelter and the equipment needed for a complete roof replacement.
What warranty should I expect on RV roof replacement?
Material warranties range from 10-12 years for rubber to 15-20 years for premium TPO or fiberglass. Labor warranties typically cover 1-3 years. Always get warranty terms in writing and understand what’s covered versus excluded. Some manufacturers require professional installation for warranty validity.
Can I walk on my RV roof after replacement?
Only walk on the roof if the RV manufacturer confirms it is designed for access and the structure is sound. A new membrane does not make weak decking safe. If there are soft spots, leaks or uncertainty about load limits, have a qualified technician inspect the roof using suitable access equipment.
Conclusion
A useful replacement estimate explains what will be removed, what will be installed and how hidden damage will be handled. Compare that scope, the written warranty and the total price before choosing a shop. Keep the inspection report, photos and invoices with your RV service records.
The cost to replace rv roof reflects various factors including material selection, RV size, installation method, and regional pricing variations. By researching options thoroughly, obtaining multiple quotes, and considering both immediate costs and long-term value, you’ll find the solution that best fits your budget and needs. Remember that timely roof replacement prevents far more expensive interior damage, making it a wise investment in your RV’s longevity and your peace of mind during travels.
Other Resources
Reddit – RV Roof Replacement Cost Discussion – Community discussion sharing real-world costs and experiences related to RV roof replacement.
Road Trip Tails – Informational article explaining the costs involved in replacing roofs on older RVs.
Liquid Rubber – Cost-focused guide outlining factors that influence RV roof replacement pricing.
RV Flex Repair – Educational article detailing average costs and considerations for RV roof replacement.
Other Helpful Articles
RV roof repair costs and smaller repair options — Compare repair scope with a complete replacement before requesting estimates.
