Edge Roofing Guide: 12 Essential Facts That Save Thousands
Edge Roofing: 12 Critical Secrets Every Homeowner Must Know

Edge roofing represents essential components that protect your home from water damage, structural deterioration, and costly repairs throughout the building’s lifespan. These critical protective systems include drip edge flashing, edge trim, and specialized components installed along roof perimeters to direct water away from vulnerable areas. Proper edge roofing installation prevents moisture infiltration into fascia boards, soffits, and underlying structural elements that support your entire roofing system. Understanding edge roofing fundamentals empowers homeowners to make informed decisions about installation, maintenance, and replacement projects.
Quality edge roofing systems combine multiple protective elements working together to create comprehensive water management solutions. The installation process requires precision, appropriate materials, and adherence to manufacturer specifications for optimal performance. Professional contractors recognize that edge roof installations significantly impact overall roof longevity and building protection.
What Is Edge Roofing and Why It Matters
Edge roofing encompasses all protective components installed along roof perimeters to manage water runoff and prevent structural damage. These systems include drip edge flashing, fascia trim, rake edges, and specialized accessories that direct moisture away from vulnerable building areas. Edge roofing prevents water from seeping behind roofing materials where it can cause wood rot, mold growth, and foundation damage.
The primary function of edge roofing involves creating a barrier between roofing materials and underlying structural components. Drip edge flashing extends beyond roof decking to guide water into gutters rather than allowing it to flow down fascia boards. This simple yet critical function protects thousands of dollars worth of structural elements from moisture-related deterioration..

Types of Edge Roofing Components Available
- Type C drip edge represents the most basic and affordable option, featuring a simple L-shaped design with a 90-degree angle. This straightforward configuration costs less than one dollar per linear foot and provides fundamental edge protection. The simple manufacturing process and easy installation make Type C edge roofing popular for budget-conscious projects.
- Type D drip edge features a T-shaped profile that extends further over roof edges to deposit water more reliably into gutters. Most professional roofers recommend Type D edge roofing for standard residential applications due to improved performance. Material costs range from $1 to $2 per linear foot, representing excellent value for enhanced protection.
- Type F edge roofing resembles Type D but features longer edges facilitating installation over existing shingles. This configuration proves ideal when adding edge roofing to completed roofs without complete tear-offs. Type F costs less than one dollar per linear foot on average, making it economical for retrofit applications.
Common edge roofing component types include:
-
Type C L-shaped drip edge for basic applications
-
Type D T-shaped drip edge for standard installations
-
Type F extended drip edge for retrofit projects
-
Rake edge trim for sloped roof sides
-
Gable trim protecting end walls
-
Ridge cap covering roof peaks
-
Valley trim managing water convergence
-
Eave trim along bottom edges
How to Find Quality Edge Roofing Materials
- Finding quality edge roofing materials starts with researching reputable suppliers specializing in roofing components and accessories. Local building supply centers typically stock standard edge roofing options suitable for most residential applications. Professional roofing distributors offer expanded selections including specialty profiles and premium materials.
- Verify that edge roofing materials meet local building code requirements before purchasing. Many municipalities specify minimum gauge thickness, material types, and installation standards for edge roofing systems. Code compliance ensures your edge roofing installation passes inspections and functions properly throughout its service life.
- Request material samples to assess quality, finish consistency, and compatibility with existing roofing components. Compare gauge thickness between different manufacturers as thicker materials provide better durability and weather resistance. Check for smooth edges without burrs or manufacturing defects that could complicate installation.
- Online reviews from contractors and homeowners provide valuable insights into edge roofing product performance and longevity. Professional roofing associations maintain directories of certified manufacturers meeting industry quality standards. Consulting with experienced contractors helps identify the best edge roofing materials for your specific climate and building requirements.
Key considerations when selecting edge roofing materials:
-
Material gauge thickness and durability
-
Corrosion resistance for local climate
-
Color matching existing roof components
-
Manufacturer warranty coverage
-
Code compliance documentation
-
Compatibility with roofing style
-
Availability of matching accessories
-
Supplier reputation and support
How to Buy Edge Roofing Components
Purchasing edge roofing requires accurate measurements of all roof perimeter edges where components will be installed. Measure eave lengths, rake edges, and any specialty areas requiring custom trim pieces. Add 10% to your total measurements to account for overlaps, cuts, and potential waste during installation.
Compare pricing from multiple suppliers to ensure competitive rates without compromising quality standards. Request detailed quotes specifying exact edge roofing types, material composition, and gauge thickness. Verify that quotes include all necessary accessories like fasteners, sealants, and corner pieces required for complete installations.
Consider purchasing all edge roofing components together to ensure color matching and design consistency. Many manufacturers produce slight variations in finishes between production runs. Ordering sufficient materials upfront prevents delays and appearance inconsistencies in completed edge roof installations.
Schedule delivery to coordinate with your installation timeline while accounting for weather conditions. Edge roof materials require dry storage protected from elements before installation. Professional contractors often purchase edge roof through specialized distributors offering better pricing and technical support than retail outlets.
How Much Does Edge Roofing Cost
Edge roofing costs $1.50 to $3.00 per linear foot installed during roof replacement projects or $150 to $600 on average for standard homes. Installing edge roofing on existing roofs costs $5 to $9 per linear foot due to increased labor complexity working around completed roofing materials. Most residential properties require 100 to 200 linear feet of edge roofing components along perimeter edges.
Material costs for edge roofing range from $0.50 to $1.00 per linear foot for standard aluminum options. Premium materials like copper edge roofing cost $4 to $8 per linear foot but deliver exceptional durability and distinctive appearance. Labor expenses account for $1 to $2 per linear foot during new installations or $3 to $7 per linear foot for retrofit applications.
Comprehensive edge roofing cost breakdown:
-
Material costs: $0.50-$1.00 per linear foot (aluminum)
-
Labor during roof replacement: $1.00-$2.00 per linear foot
-
Retrofit labor costs: $3.00-$7.00 per linear foot
-
Copper premium materials: $4.00-$8.00 per linear foot
-
Total installed new construction: $1.50-$3.00 per linear foot
-
Total installed retrofit: $5.00-$9.00 per linear foot
-
Average project total: $150-$600 for standard homes
-
Large retrofit projects: $500-$1,800 typical range
How Long Does Edge Roofing Last
Edge roofing longevity depends on material type, installation quality, local climate conditions, and maintenance practices throughout the system’s service life. Aluminum edge roofing typically lasts 20 to 30 years in most environments, matching or exceeding the lifespan of associated roofing materials. Copper edge roof can endure 50 years or more, often outlasting multiple roof replacements.
Galvanized steel edge roofing provides 15 to 25 years of reliable service when protected from excessive moisture exposure. Coastal environments accelerate corrosion in steel edge roofing, reducing effective lifespans compared to inland locations. Zinc edge roofing delivers 30 to 40 years of performance in regions experiencing temperature fluctuations and diverse weather patterns.
Proper installation significantly impacts edge roofing durability and operational lifespan. Components installed with correct overlap, appropriate fastening, and adequate sealing last considerably longer than improperly installed systems. Regular inspections identifying minor issues before they escalate preserve edge roof functionality and extend service life.
UV exposure, thermal cycling, and precipitation patterns influence edge roof deterioration rates. Painted finishes on edge roofing components may fade or chalk over time while maintaining protective properties. Annual inspections help homeowners assess edge roofing condition and plan for eventual replacement before failure occurs.

How to Install Edge Roofing Components
- Installing edge roofing begins with removing existing components if present, then inspecting roof decking for damage or deterioration. Repair any compromised decking sections before proceeding with new edge roofing installation to ensure proper support. Clean all debris from roof edges and ensure fascia boards remain in good condition.
- Start edge roofing installation at the eaves along the bottom roof perimeter where water naturally flows off the structure. Position drip edge so it extends slightly beyond fascia boards, creating a gap for water to flow into gutters. The installation sequence at eaves differs from rake edges—install drip edge first at eaves, then apply underlayment over it.
- Secure edge roofing with roofing nails placed every 8 to 12 inches along the top flange. Drive nails straight to prevent buckling or gaps in the edge roof system. Overlap adjoining sections by at least 2 inches to create watertight seams preventing moisture infiltration.
- At rake edges along sloped roof sides, reverse the installation sequence by placing underlayment first, then installing edge roofing over it. This prevents wind-driven rain from penetrating beneath roofing materials. Apply roofing sealant at joints and corners to enhance water resistance.
Detailed edge roofing installation steps:
-
Remove old edge roof and inspect decking
-
Repair damaged fascia or soffit components
-
Clean debris from all roof edges thoroughly
-
Measure and cut edge roof sections accurately
-
Install drip edge first at eaves edges
-
Apply underlayment over eave drip edge
-
Nail edge roof every 8-12 inches
-
Overlap sections 2 inches minimum
-
Install underlayment first at rake edges
-
Position edge roofing over rake underlayment
-
Seal all joints and corners with caulk
-
Conduct final inspection for alignment
-
Verify proper water flow direction
-
Check for gaps or loose fasteners
How to Clean Edge Roofing Systems
Cleaning edge roofing maintains its appearance and prevents clogging from debris accumulation that impedes proper water flow. Use a soft-bristled brush or cloth with mild detergent and water to remove dirt, leaves, and organic matter from edge roof surfaces. Avoid harsh chemicals or abrasive tools that could damage protective finishes or scratch metal components.
Clear gutters and downspouts simultaneously with edge roof cleaning to ensure complete water management system functionality. Gutter cleaning costs $100 to $250 on average and should occur at least twice yearly. Debris accumulation in gutters can back up against edge roof, creating moisture problems and potential rot in fascia boards.
Inspect edge roofing during cleaning sessions for signs of damage, loose fasteners, or deteriorating sealants. Address minor issues immediately before they develop into costly repairs requiring extensive edge roof replacement. Check that edge roof maintains proper positioning and hasn’t pulled away from fascia boards or roof decking.
Edge roofing cleaning and maintenance guidelines:
-
Clean edge roof twice annually minimum
-
Use only non-abrasive cleaning materials
-
Clear debris from behind edge roofing
-
Inspect fasteners and seals during cleaning
-
Remove organic growth immediately
-
Rinse thoroughly to prevent residue
-
Check alignment and positioning
-
Document any damage or wear patterns
What Is the Cost of Edge Roofing Repairs
Edge roofing repair costs vary widely depending on damage extent, material type, and accessibility factors affecting labor requirements. Minor repairs like resealing joints or replacing individual damaged sections cost $100 to $300 on average. Extensive edge roofing damage requiring significant component replacement ranges from $500 to $1,800 depending on linear footage involved.
Fascia and soffit repairs often accompany edge roof work when moisture damage extends to these components. Fascia and soffit replacement costs $9 to $34 per linear foot depending on material type and installation complexity. Combined edge roofing and fascia repairs on existing homes total $500 to $2,600 for typical projects.
Retrofitting edge roofing onto existing roofs costs three times more than installation during initial roof replacement due to labor complexity. The delicate process of working around completed shingles without causing damage requires experienced contractors and additional time. Planning edge roof installation during scheduled roof replacements maximizes cost efficiency.
Additional expenses may include roof repairs if edge roofing failure caused leaks damaging shingles or decking. Roof repair costs $150 to $1,000 on average for fixing minor leaks or replacing damaged shingles. Gutter repairs cost $100 to $450 when edge roofing problems impact water management systems.
Advantages of Edge Roofing Systems
- Edge roofing provides essential protection preventing water damage to fascia boards, soffits, and underlying structural components. This primary advantage saves homeowners thousands of dollars in potential repair costs over the building’s lifespan. Proper edge roof installation ensures water flows into gutters rather than behind roofing materials where moisture causes deterioration.
- Building code compliance represents another significant advantage of edge roofing in many jurisdictions. Many regions mandate edge roof installation on new construction and replacement projects, recognizing its critical protective function. Installing quality edge roofing ensures projects pass inspections and meet regulatory requirements.
- Enhanced roof longevity results from edge roof protecting vulnerable perimeter areas from moisture infiltration. Roofing systems without adequate edge protection experience premature failure from rot, mold, and structural degradation. The relatively modest investment in edge roof delivers substantial returns through extended roof life.
Key advantages of edge roofing include:
-
Prevents water damage to structural components
-
Protects fascia and soffit from moisture
-
Directs water flow into gutters efficiently
-
Extends overall roofing system lifespan
-
Meets building code requirements
-
Reduces maintenance and repair costs
-
Enhances property curb appeal
-
Provides finished professional appearance
-
Prevents ice dam formation in cold climates
Challenges Connected to Edge Roofing
- Retrofit installation complexity represents the primary challenge with edge roofing on existing homes with completed roofs. Working around shingles without causing damage requires specialized skills and significantly increases labor costs. Many homeowners delay edge roof installation until roof replacement, missing years of protection benefits.
- Material selection confusion challenges homeowners unfamiliar with different edge roof types and their specific applications. Choosing inappropriate edge roof profiles or materials can result in suboptimal performance and premature failure. Professional consultation helps navigate the numerous options and identify ideal solutions for specific situations.
- Proper installation sequence knowledge remains critical for edge roof effectiveness but confuses many DIY installers. The different installation orders for eaves versus rakes creates opportunities for errors compromising water management. Improper installation negates roofing benefits and may actually increase moisture problems.
- Climate-specific considerations affect edge roof material selection and installation techniques. Coastal environments require corrosion-resistant materials while cold climates need edge roof designed to prevent ice dam formation. Failing to account for local conditions reduces edge roof longevity and performance.
Common edge roofing challenges:
-
Retrofit installation costs three times more
-
Material selection requires expertise
-
Installation sequence varies by location
-
Climate factors influence material choice
-
Requires coordination with gutter systems
-
Mistakes cause rather than prevent damage
-
Color matching existing components difficult
-
Some designs more prone to debris accumulation
Specialized Edge Roofing Components and Applications
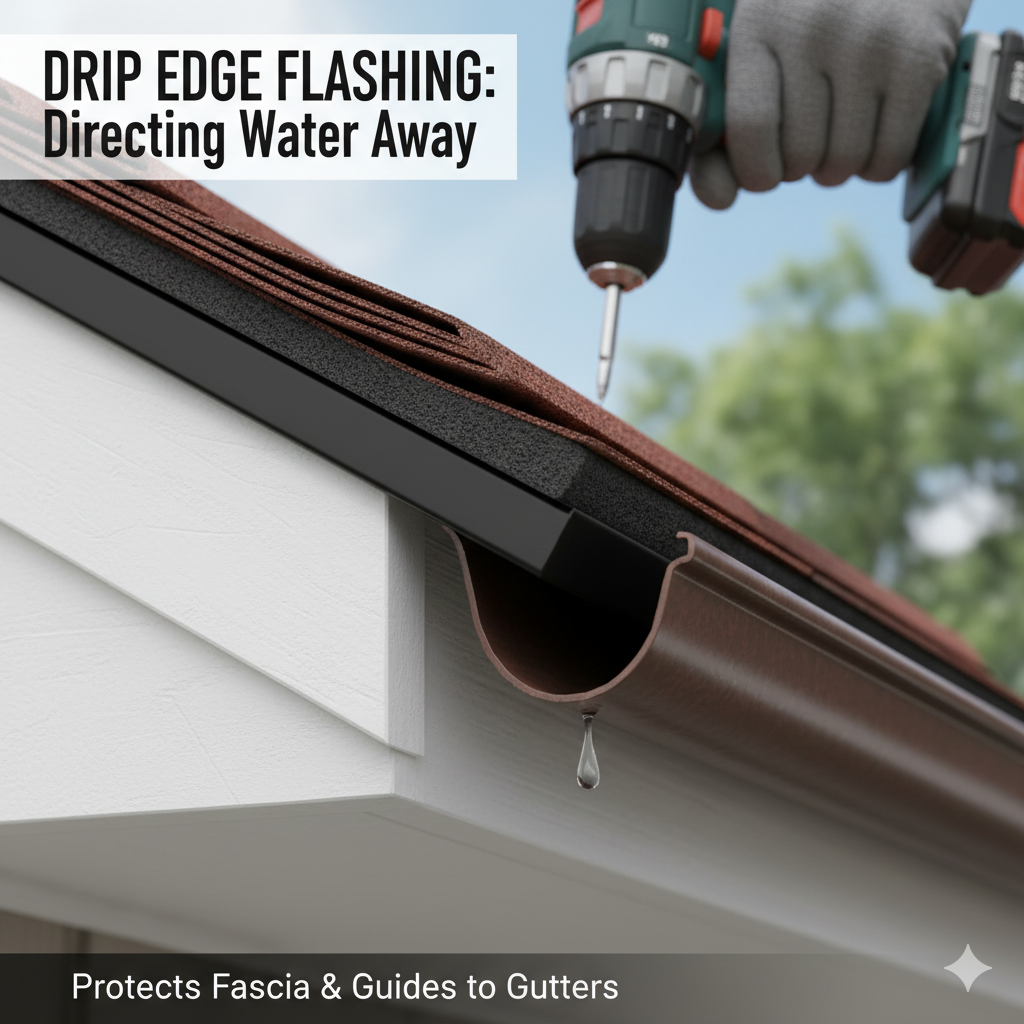
Roof Drip Edge Flashing Protection
Roof drip edge flashing serves as the primary edge roofing component protecting vulnerable transition areas between roofing materials and vertical building surfaces. This specialized flashing features angled profiles directing water away from fascia boards and into gutter systems efficiently.
Multiple material options including aluminum, galvanized steel, copper, and zinc accommodate different budget levels and performance requirements. Professional installation involves precise positioning ensuring drip edge extends beyond roof decking while maintaining proper alignment with gutters.
The component prevents water from wicking underneath roofing materials where moisture causes rot and structural deterioration. Quality roof drip edge flashing withstands decades of exposure to precipitation, UV radiation, and temperature fluctuations. Homeowners investing in premium drip edge materials enjoy enhanced durability and reduced long-term maintenance requirements for comprehensive roof protection.
Roof Drip Edge Installation Techniques
Roof drip edge represents the specific metal component installed along eaves and rakes to manage water runoff effectively throughout the roofing system’s service life. Installation begins at lower roof corners, working systematically toward opposite ends while maintaining consistent positioning and overlap dimensions. Fasteners must penetrate roof decking adequately while spacing appropriately to prevent buckling or gaps compromising water management effectiveness.
The installation sequence differs between eaves and rakes—eave drip edge goes beneath underlayment while rake drip edge installs over it. This sequence variation prevents wind-driven rain infiltration while ensuring gravity-fed water flows properly into gutters. Proper roof drip edge positioning creates slight overhangs beyond fascia boards allowing water to fall freely rather than flowing down vertical surfaces. Sealing joints and corners with roofing adhesive enhances water resistance and prevents infiltration at vulnerable connection points.
4×8 Panel for Soffit Under Edge of Roof
Soffit panels measuring 4×8 feet provide durable covering for areas under roof edges between exterior walls and fascia boards protecting these vulnerable spaces. These panels install perpendicular to framing supports spaced maximum 24 inches on center, secured with appropriate fasteners penetrating framing minimum one inch. Installation requires leaving 3/16-inch gaps at all panel joints allowing for thermal expansion and contraction preventing buckling.
Soffit panels coordinate with edge roofing systems by providing finished surfaces beneath drip edge and fascia components creating complete protection assemblies. Proper installation supports edge roofing functionality by preventing moisture infiltration from below while allowing ventilation to attic spaces. Some applications utilize soffit panels as roof sheathing first course when installed face-down with edges fully supported by blocking. The panels require protection against permanent weather exposure with appropriate sealing and trim integration for long-term performance.
Roof Edging Trim Options
Roof edging trim encompasses various specialized components finishing roof perimeters while providing functional protection against water infiltration and weather damage. Standard profiles include eave trim, gable trim, rake trim, ridge cap, and valley trim serving distinct purposes throughout roofing systems. Material options range from aluminum and galvanized steel to premium copper selections accommodating diverse aesthetic preferences and budget constraints.
Trim sizing variations designated as A1 through A6 and specialized profiles like F2, F3, and F4 address specific roofing requirements and edge configurations. Angular profiles designed for external and internal corners ensure seamless transitions at complex roof junctions maintaining water management integrity. Professional installation coordinates roof edging trim with edge roofing components creating comprehensive protection systems. Quality trim enhances curb appeal while delivering decades of reliable performance protecting vulnerable roof perimeter areas from environmental damage and moisture infiltration.
")
Frequently Asked Questions
What exactly does edge roof protect my home from?
Edge roofing protects fascia boards, soffits, roof decking, and underlying structural components from water damage that causes rot, mold growth, and deterioration. Without proper edge roof, water flows behind roofing materials or down fascia boards causing thousands of dollars in repair costs over time.
Can I install edge myself or should I hire professionals?
While experienced DIYers can install edge roof during roof replacement projects, professional installation ensures proper techniques and sequences. Retrofit edge roof on existing roofs proves particularly challenging and typically requires professional expertise to avoid damaging shingles or creating new problems.
How do I know what type of edge roofing my home needs?
The appropriate edge roof type depends on your roof style, climate conditions, budget, and whether you’re installing during new construction or retrofitting existing roofs. Type D drip edge suits most standard residential applications while Type F works better for retrofit projects. Consulting local roofing contractors familiar with regional requirements provides the best guidance.
Does edge roofing really make a significant difference for my roof?
Yes, edge roof significantly impacts overall roof performance and longevity by preventing moisture infiltration at vulnerable perimeter areas. Roofs without proper edge protection experience premature failure from water damage to fascia, soffits, and decking. The modest investment in edge roof prevents exponentially higher repair costs later.
How often should I inspect my edge roofing system?
Homeowners should inspect edge roof at least twice yearly, preferably during spring and fall, checking for damage, loose fasteners, or deteriorating sealants. Additional inspections after severe storms help identify problems early before minor issues become major repairs. Clean debris from behind edge roof during inspections to maintain proper function.
What’s the difference between drip edge and gutter apron?
Drip edge directs water away from fascia into gutters while gutter apron provides additional protection between roof edges and gutter systems. Installing gutter apron costs $2 to $5 per linear foot compared to $1.50 to $3.00 for standard drip edge. Many homes benefit from both components working together for comprehensive protection.
Conclusion
Edge roofing represents essential protection for residential and commercial properties preventing costly water damage and structural deterioration throughout the building’s lifespan. Quality edge components including drip edge flashing, specialized trim, and coordinated accessories create comprehensive water management systems directing moisture away from vulnerable areas. Professional installation during roof replacement projects delivers maximum value while retrofit applications provide critical protection for existing structures lacking adequate edge systems.
🏠 Other Resources
-
Roofs By Edge – Official website offering roofing services, repairs, and installations.
-
Edge Roofing LLC – Local roofing contractor specializing in residential and commercial roofs.
-
BBB – LLC Profile – Business accreditation, ratings, and customer reviews.
-
Yelp – Dahlonega – Customer reviews, ratings, and project photos.
🔎 Other Helpful Articles
-
Roofing Cement Repair – How to repair roof leaks with cement.
-
Torch Down Roofing Install – Complete installation guide for torch-down roofing.
-
Aluminum Roofing Costs – Pricing, pros, and material considerations.