Easy Roof Vent Installation: Tips for a Cool Home
Roof Vent Installation: Proven Steps
Proper ventilation is critical for maintaining a healthy, durable roofing system that protects your home from moisture damage, heat buildup, and premature deterioration. Installing adequate roof vents ensures continuous airflow through your attic space, regulating temperature extremes and preventing condensation that can lead to mold growth, wood rot, and structural damage. Understanding roof vent installation helps homeowners make informed decisions about improving their home’s energy efficiency while extending the lifespan of their roofing materials.
What Is Roof Vent Installation
Roof vent installation is the process of strategically placing ventilation openings in your roof structure to facilitate proper air circulation between the attic space and the exterior environment. This systematic approach involves cutting precise openings through roofing materials, securing ventilation units with appropriate fasteners, and creating watertight seals to prevent leaks while maintaining optimal airflow. Professional roof vent installation requires careful planning to determine the correct number, type, and placement of vents based on your roof’s design, square footage, and existing ventilation components.
The installation process combines intake vents, typically located at the soffits or lower roof sections, with exhaust vents positioned near the ridge or upper portions of the roof. This balanced system creates natural convection currents that draw cool air into the attic while expelling hot, moisture-laden air through the upper vents. Effective roof vent installation addresses ventilation requirements specific to your climate, roof pitch, and architectural style to maximize performance and durability.
Types of Vents for Roof Vent Installation
Ridge vents represent the most popular choice for roof vent installation, running continuously along the peak of the roof to provide uniform exhaust ventilation across the entire ridge line. These low-profile vents remain virtually invisible beneath ridge cap shingles while delivering consistent passive airflow that effectively manages attic temperatures. Ridge vent installation costs between $240 and $600 for a standard two-story home, making them an economical option for comprehensive ventilation coverage.
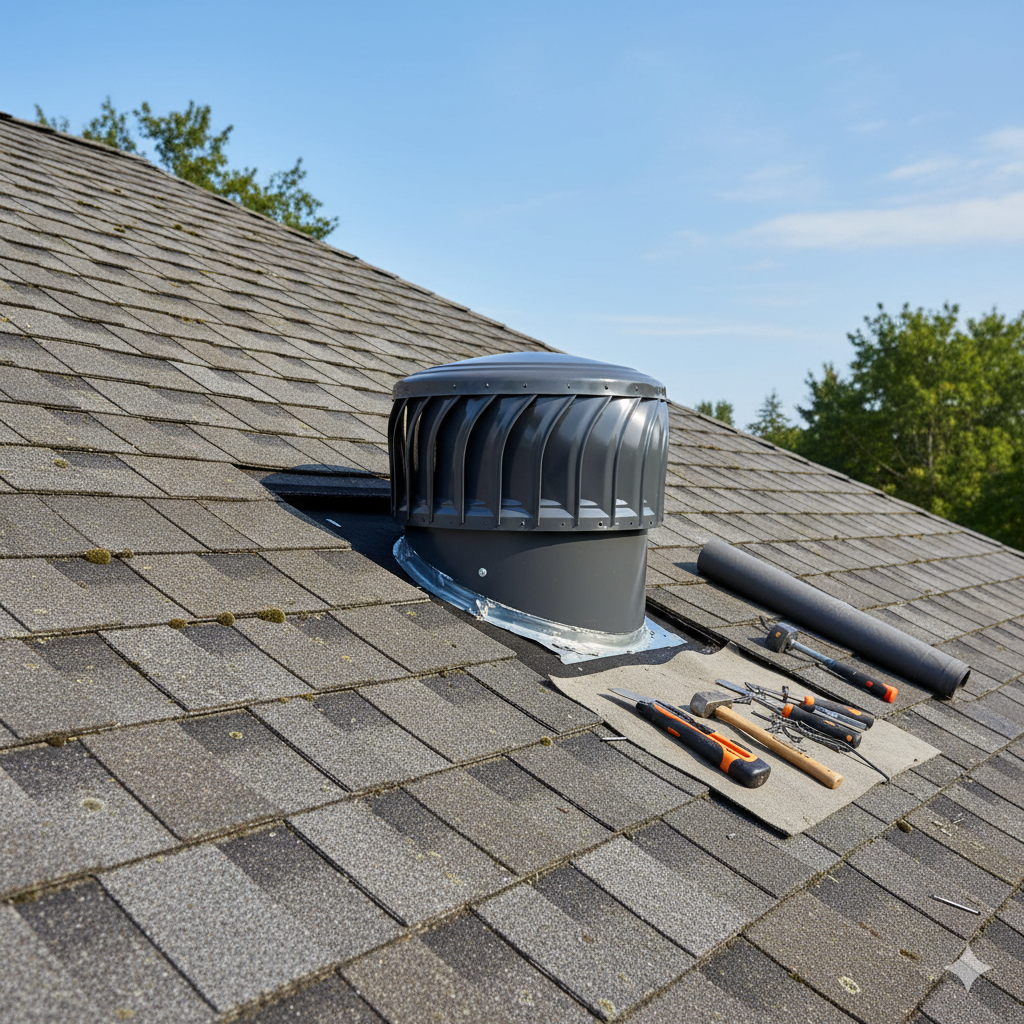
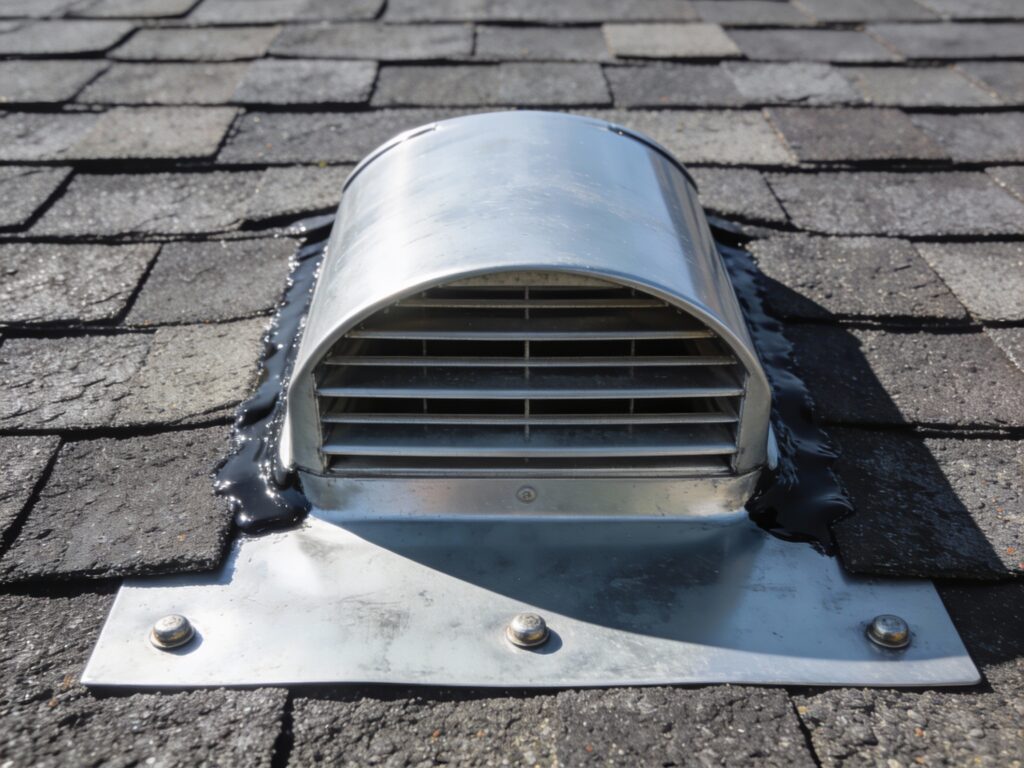
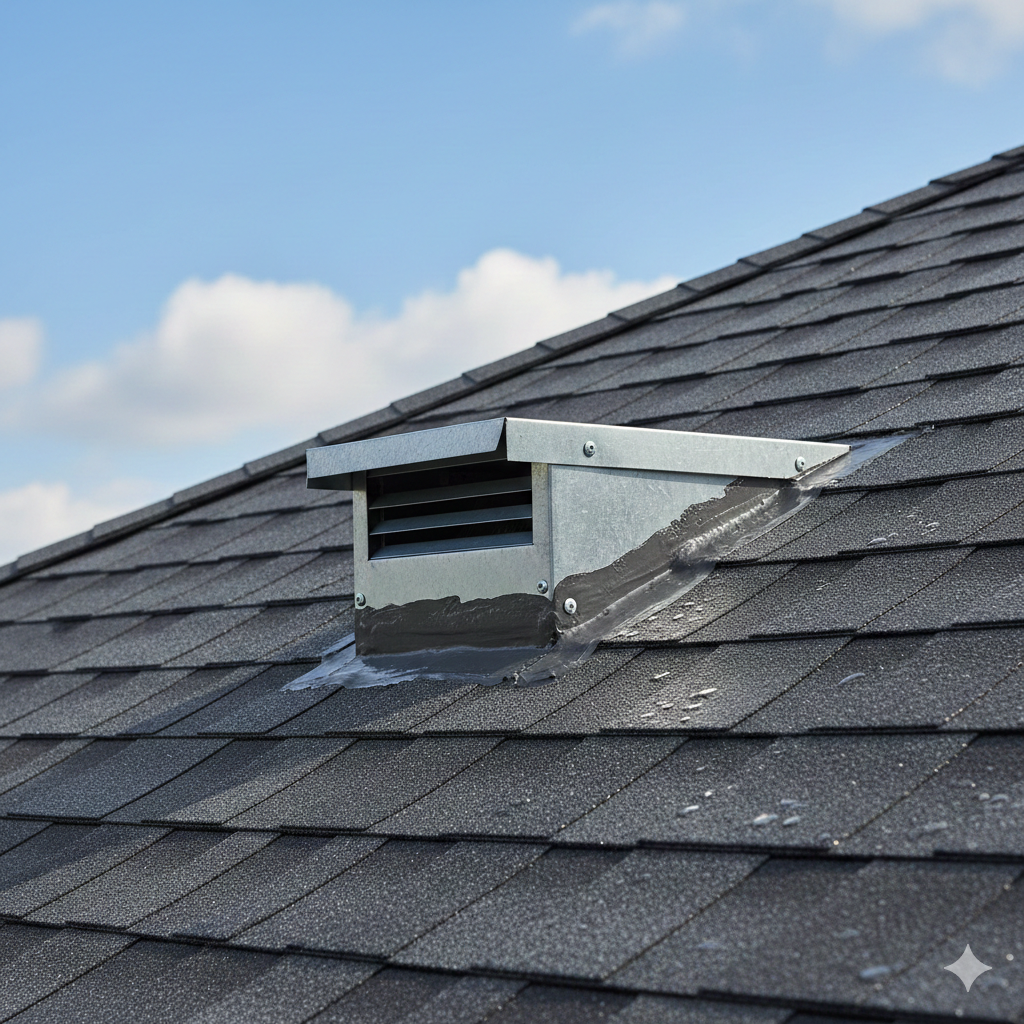
Box vents, also called turtle vents or low-profile vents, are square or rectangular units installed near the roof ridge to release trapped hot air from specific attic zones. Turbine vents feature wind-powered spinning mechanisms that enhance air circulation, particularly effective in areas with consistent breezes. Gable vents mount at the triangular ends of attic spaces in gable-style roofs, facilitating cross-ventilation when paired with proper intake vents. Soffit vents install beneath roof eaves to provide crucial fresh air intake, working in conjunction with exhaust vents to complete the ventilation system.
Solar-powered vents incorporate photovoltaic panels to operate electric fans, offering active ventilation without adding to your electricity costs, though installation expenses range from $300 to $1,400.
How to Find Quality Roof Vent Installation Services
2. Verify contractor licensing, insurance coverage, and certifications from roofing material manufacturers
3. Request detailed written estimates that itemize materials, labor costs, and project timelines for roof vent installation
4. Review customer testimonials and before-and-after photos of completed roof vent installation projects
5. Confirm warranty coverage for both materials and workmanship related to roof vent installation
6. Ask about the contractor’s experience with your specific roof type and preferred ventilation style
7. Inquire about the calculation methods used to determine proper ventilation ratios for your attic space
Professional roof vent installation requires expertise in roof penetration techniques, flashing integration, and waterproofing methods that protect your home from leaks. Reputable contractors conduct thorough attic assessments before recommending roof vent installation solutions tailored to your home’s unique ventilation needs.
How to Buy Materials for Roof Vent Installation
Purchasing appropriate materials for roof vent installation begins with accurate measurements of your roof’s ridge length, attic square footage, and existing ventilation openings. Calculate the required net free ventilation area using the standard ratio of one square foot of ventilation per 150 square feet of attic space. Select vent types that complement your roof’s architectural style while meeting or exceeding recommended airflow specifications for effective roof vent installation.
Home improvement retailers stock various roof vent installation materials, including ridge vents priced at $2 to $3 per linear foot, box vents ranging from $25 to $180 per unit, and turbine vents costing $75 to $300 each. Purchase matching underlayment, roofing nails specifically designed for your roof material, high-quality roofing cement or sealant, and appropriate flashing materials to ensure watertight roof vent installation. Consider upgrading to premium materials featuring UV-resistant plastics, corrosion-proof metals, or enhanced weather seals that provide superior durability for long-term roof vent installation performance.
How Much Does Roof Vent Installation Cost
Roof vent installation costs typically range from $240 to $600 for most residential projects, with the national average settling around $450 for ridge vent installation on a standard two-story home with a gable roof. Basic turtle vent installation on a single-story structure with straightforward roof access may cost as little as $55, while complex solar vent installation with protective covers on steep roofs can reach $1,450. Labor expenses for roof vent installation generally run between $45 and $75 per hour, with most projects requiring one to four hours depending on roof complexity and vent quantity.
Material costs contribute significantly to total roof vent installation expenses, with ridge vents priced between $150 and $300, soffit vents ranging from $200 to $250, and electric-powered vents costing $130 to $700 before installation. Roofing professionals typically charge a minimum service fee of $150 to $300 for roof vent installation, making it economical to address multiple vents during a single service call. Additional factors affecting roof vent installation costs include roof pitch steepness, accessibility challenges, the need for structural modifications, and geographic location, with prices varying by $150 to $2,000 based on these variables.
How Long Does Roof Vent Installation Take
Standard roof vent installation projects typically require one to four hours for completion, depending on the vent type, quantity, and roof accessibility. Simple box vent or turtle vent installation on easily accessible roof sections may take as little as 60 to 90 minutes per unit for experienced professionals. Ridge vent installation demands more time due to the continuous cutting required along the roof peak, generally consuming two to four hours for a complete ridge line on an average-sized home.
Multiple factors influence roof vent installation duration, including roof pitch steepness, existing roofing material condition, weather conditions, and the installer’s experience level. Powered vent installation involving electrical connections adds approximately 30 to 60 minutes to standard roof vent installation timeframes. Homeowners should anticipate longer installation periods for projects requiring extensive preparation, such as removing old vents, repairing damaged decking, or addressing inadequate attic insulation discovered during roof vent installation.
How to Install Roof Vents: Complete Process
Comprehensive Roof Vent Installation Methods
How to Install Roof Vent: Begin by selecting the optimal location for roof vent installation, typically positioned one-third of the way down from the ridge between roof rafters to maximize exhaust efficiency. From inside the attic, drive a nail through the roof decking at the chosen spot to mark the location, then carefully remove surrounding shingles on the exterior to expose the underlayment and decking.
Use a chalk line and measuring tape to mark the exact dimensions of the vent opening, ensuring the outline accounts for the vent body but excludes the flange that will slip under upper shingles. Cut the opening with a circular saw or reciprocating saw, maintaining caution to avoid rafters, electrical wiring, or structural components while cutting through roofing layers.
How to Install a Roof Ridge Vent: Ridge vent installation begins with carefully removing existing ridge cap shingles using a pry bar, working methodically to preserve the underlying roof structure. Mark a cutting line approximately one inch from either side of the ridge board along the entire ridge length, creating a continuous slot for optimal airflow during roof vent installation. Use a circular saw with depth settings adjusted to cut through decking without damaging rafters, maintaining steady control for clean, straight cuts along marked guidelines.
Position ridge vent sections over the opening, starting at one roof end and ensuring each segment overlaps the previous piece to prevent air leaks and water infiltration.
Roof Ridge Vent Installation: Secure ridge vent sections with roofing nails spaced according to manufacturer specifications, typically every 12 to 18 inches along both edges of the vent. Apply roofing cement or specialized sealant along the vent edges and around nail heads to create watertight seals that prevent moisture penetration during roof vent installation. Install new ridge cap shingles over the vent, overlapping each shingle and fastening securely while maintaining consistent alignment with the roof’s aesthetic.
Complete the installation by inspecting all seals, verifying proper vent alignment, and confirming that lower shingles properly channel water away from the roof vent installation.
How to Install Roof Vents: After cutting the vent opening and removing necessary roofing materials, position the vent so its flange slides beneath shingles on the upper side of the opening while resting atop lower shingles. Secure the vent with four to six corrosion-resistant roofing nails around the flange perimeter, following manufacturer guidelines for proper fastener placement during roof vent installation.
Apply generous amounts of roofing cement around the vent edges, nail heads, and any potential water entry points to establish comprehensive waterproofing. Reattach or install new shingles around the vent, ensuring proper overlap patterns that direct water flow away from the roof vent installation while maintaining the roof’s weather protection.

How to Clean and Maintain Roof Vent Installation
Regular maintenance of roof vent installation begins with scheduled inspections every six months to identify debris accumulation, seal deterioration, or mechanical component wear that compromises ventilation performance. Remove leaves, twigs, nests, and other debris from vent openings using soft brushes or low-pressure air blowers, avoiding aggressive cleaning methods that might damage vent components or surrounding roofing materials. Install protective screens over vent openings to prevent debris intrusion while maintaining adequate airflow for effective Installing roof vents functionality.
Professional roof vent installation maintenance should occur annually, particularly before extreme weather seasons, to ensure optimal system performance. Address identified problems promptly to prevent minor issues from escalating into costly repairs affecting your Installing roof vents integrity.

What Is the Cost of Professional Roof Vent Installation
Professional roof vent installation services charge between $200 and $750 for most residential projects, with costs varying based on vent type, quantity, and installation complexity. Ridge vent installation through professional contractors typically costs $7 to $15 per linear foot or $350 to $600 for complete ridge line coverage on an average home. Soffit vent installation ranges from $300 to $650, while solar-powered vent installation commands premium pricing between $300 and $1,400 due to electrical components and specialized installation requirements.
Labor constitutes approximately 60 to 70 percent of total professional roof vent installation costs, reflecting the specialized skills required for proper roof penetration, weatherproofing, and ventilation system integration. Contractors factor in roof accessibility, pitch steepness, existing ventilation modifications, and geographic labor rates when calculating roof vent installation quotes. Investing in professional roof vent installation ensures proper techniques, manufacturer warranty compliance, and long-term performance that protects your roofing investment from moisture damage and premature failure.
Advantages of Proper Roof Vent Installation
Effective roof vent installation significantly extends roofing material lifespan by preventing excessive heat accumulation that accelerates shingle degradation, warping, and premature aging. Proper ventilation through strategic Installing roof vents reduces attic temperatures by 20 to 40 degrees Fahrenheit during summer months, decreasing the workload on air conditioning systems and lowering energy costs by 10 to 15 percent. Moisture control represents another critical advantage, as Installing roof vents facilitates continuous air exchange that prevents condensation, mold growth, and wood rot in attic spaces.
Well-executed roof vent installation creates balanced ventilation systems that optimize natural airflow without requiring powered components or ongoing energy consumption. The initial investment in quality Installing roof vents delivers long-term returns through reduced maintenance costs, extended roof lifespan, and improved home energy efficiency.
Challenges Associated with Roof Vent Installation
Improper vent placement during roof vent installation creates inconsistent airflow patterns that produce hot spots, humidity concentrations, and ineffective ventilation throughout attic spaces. Installing insufficient ventilation capacity represents a common challenge, as homes often lack adequate vent quantity to meet recommended airflow ratios, particularly after renovations or additions that increase attic square footage. Poorly executed Installing roof vents techniques lead to water infiltration around vent penetrations due to inadequate flashing, deteriorated seals, or incorrect installation sequences.
Weathering and component degradation pose ongoing challenges for roof vent installation, as exposure to UV radiation, temperature extremes, and precipitation gradually compromises vent materials and sealing compounds. Clogged vents from debris accumulation restrict airflow and attract pests, diminishing Installing roof vents effectiveness without regular maintenance interventions. Frost formation and ice buildup in vent openings during winter months indicate ventilation imbalances that require assessment and correction by experienced professionals.
2. Existing obstructions like chimneys, skylights, or solar panels limit available vent locations
3. Structural limitations such as inadequate rafter spacing restrict certain vent type options
4. Coordinating intake and exhaust vent ratios requires careful calculation and planning
5. Matching new vents aesthetically with existing roofing materials and architectural styles
Addressing Installing roof vents challenges demands professional expertise in ventilation system design, building science principles, and roofing construction techniques. Consulting qualified contractors ensures proper solutions that overcome installation obstacles while delivering effective, long-lasting ventilation performance.
Frequently Asked Questions About Roof Vent Installation
What tools are needed for roof vent installation?
Essential tools for Installing roof vents include a circular saw for cutting roof decking, a hammer for securing nails, a utility knife for trimming shingles, roofing nails for fastening components, a pry bar for removing existing materials, and asphalt plastic cement for waterproof sealing. Additional helpful tools include a chalk line for marking accurate cut lines, measuring tape for precise dimensions, safety equipment such as harnesses and goggles, and a reciprocating saw for detailed cutting work around obstacles.
Can I install roof vents myself or should I hire a professional?
Homeowners with roofing experience, proper safety equipment, and confidence working at heights can successfully complete roof vent installation as a DIY project for simpler vent types like box vents or turtle vents. However, professional installation is strongly recommended for ridge vent installation, powered vents requiring electrical work, or projects on steep roofs where safety risks and technical complexity increase substantially. Professional Installing roof vents ensures proper ventilation calculations, waterproofing techniques, and manufacturer warranty compliance that protect your investment.
How many roof vents do I need for proper ventilation?
Calculate required Installing roof vents quantity using the standard formula of one square foot of net free ventilation area per 150 square feet of attic floor space, with intake and exhaust vents balanced in a 50/50 ratio. For example, a 1,500-square-foot attic requires 10 square feet of total ventilation, split between five square feet of intake vents and five square feet of exhaust vents. Consult professional roofing contractors for accurate Installing roof vents assessments that account for your specific roof design, climate conditions, and existing ventilation components.
What are signs that I need roof vent installation or replacement?
Indicators requiring roof vent installation or upgrades include excessive attic heat during summer, visible moisture or frost accumulation in winter, mold or mildew growth on attic surfaces, premature shingle deterioration, ice dam formation along roof edges, and unexpectedly high energy bills. Additional warning signs include condensation on attic insulation, musty odors in upper floors, peeling paint on exterior walls near the roofline, and rusted nails or metal components in the attic space.
How long does roof vent installation last?
Quality roof vent installation typically provides 15 to 25 years of effective service when properly maintained, though longevity varies based on vent type, material quality, climate conditions, and maintenance consistency. Ridge vents constructed from durable materials with UV-resistant properties often outlast the surrounding roofing materials, while mechanical components in powered vents may require replacement every 10 to 15 years. Regular inspections and maintenance significantly extend roof vent installation lifespan by addressing minor issues before they compromise system performance.
Does roof vent installation damage my roof?
Proper roof vent installation techniques performed by experienced professionals minimize roof damage through careful cutting, appropriate flashing integration, and comprehensive waterproofing that maintains structural integrity. When executed correctly, Installing roof vents actually protects your roof from moisture damage and heat deterioration that would otherwise shorten its lifespan. However, improper installation methods, inadequate sealing, or incorrect vent placement can create leak pathways and compromise roof performance, emphasizing the importance of quality workmanship during Installing roof vents.
What is the best season for roof vent installation?
Spring and fall represent ideal seasons for roof vent installation, offering moderate temperatures, lower precipitation likelihood, and comfortable working conditions that facilitate quality installation work. Avoid scheduling Installing roof vents during extreme heat, cold, or wet weather that compromises sealant performance and creates safety hazards for installers. However, urgent roof vent installation needs arising from discovered ventilation problems should be addressed promptly regardless of season to prevent ongoing damage to your roofing system.
Conclusion
Roof vent installation provides essential benefits for protecting your home’s roofing system, controlling moisture, regulating temperature, and improving energy efficiency throughout the year. Understanding the various vent types, installation processes, cost considerations, and maintenance requirements enables homeowners to make informed decisions about implementing effective ventilation solutions. Whether you choose professional services or carefully executed DIY roof vent installation, proper ventilation represents a valuable investment that extends roof lifespan, prevents costly damage, and enhances overall home comfort and performance.
🔧 Other Resources
• YouTube Video – Video demonstrating Installing roof vents techniques and best practices.
• YouTube Video – Video showing step-by-step guidance for installing or servicing roof vents.
• IKO – How to Install a Roof Vent – Manufacturer blog article explaining Installing roof vents steps and considerations.
🔎 Other Helpful Articles
• Roof Vent Cost – Informational article outlining typical costs and pricing factors for roof vent installation.
• Roof Vent Cap Installation – Technical guide describing how to install a roof vent cap.
• Metal Roof Ridge Vent – Educational article explaining metal roof ridge vents and their functions.