Roof Sheathing: Best Pro Secret
Roof Sheathing: Key Safety Tips
Every homeowner understands the visible components of their home’s exterior, such as the shingles, the gutters, and the siding. However, the true strength of a roofing system lies beneath the surface. This hidden layer is the backbone of your home’s protection against the elements, providing the necessary structural integrity to hold everything else in place. While often overlooked, this component is critical for preventing leaks, ensuring proper insulation, and maintaining the overall stability of the house frame.
Without a solid foundation, even the most expensive shingles will fail. Understanding the mechanics of your roof’s underlayer is essential for anyone looking to build a new home or renovate an older one. It connects the rafters to the weather-proofing layers and acts as the primary defense against wind uplift and heavy snow loads. By gaining a deeper knowledge of this structural element, you can make informed decisions that save money and extend the lifespan of your property.
Understanding the Core Functionality
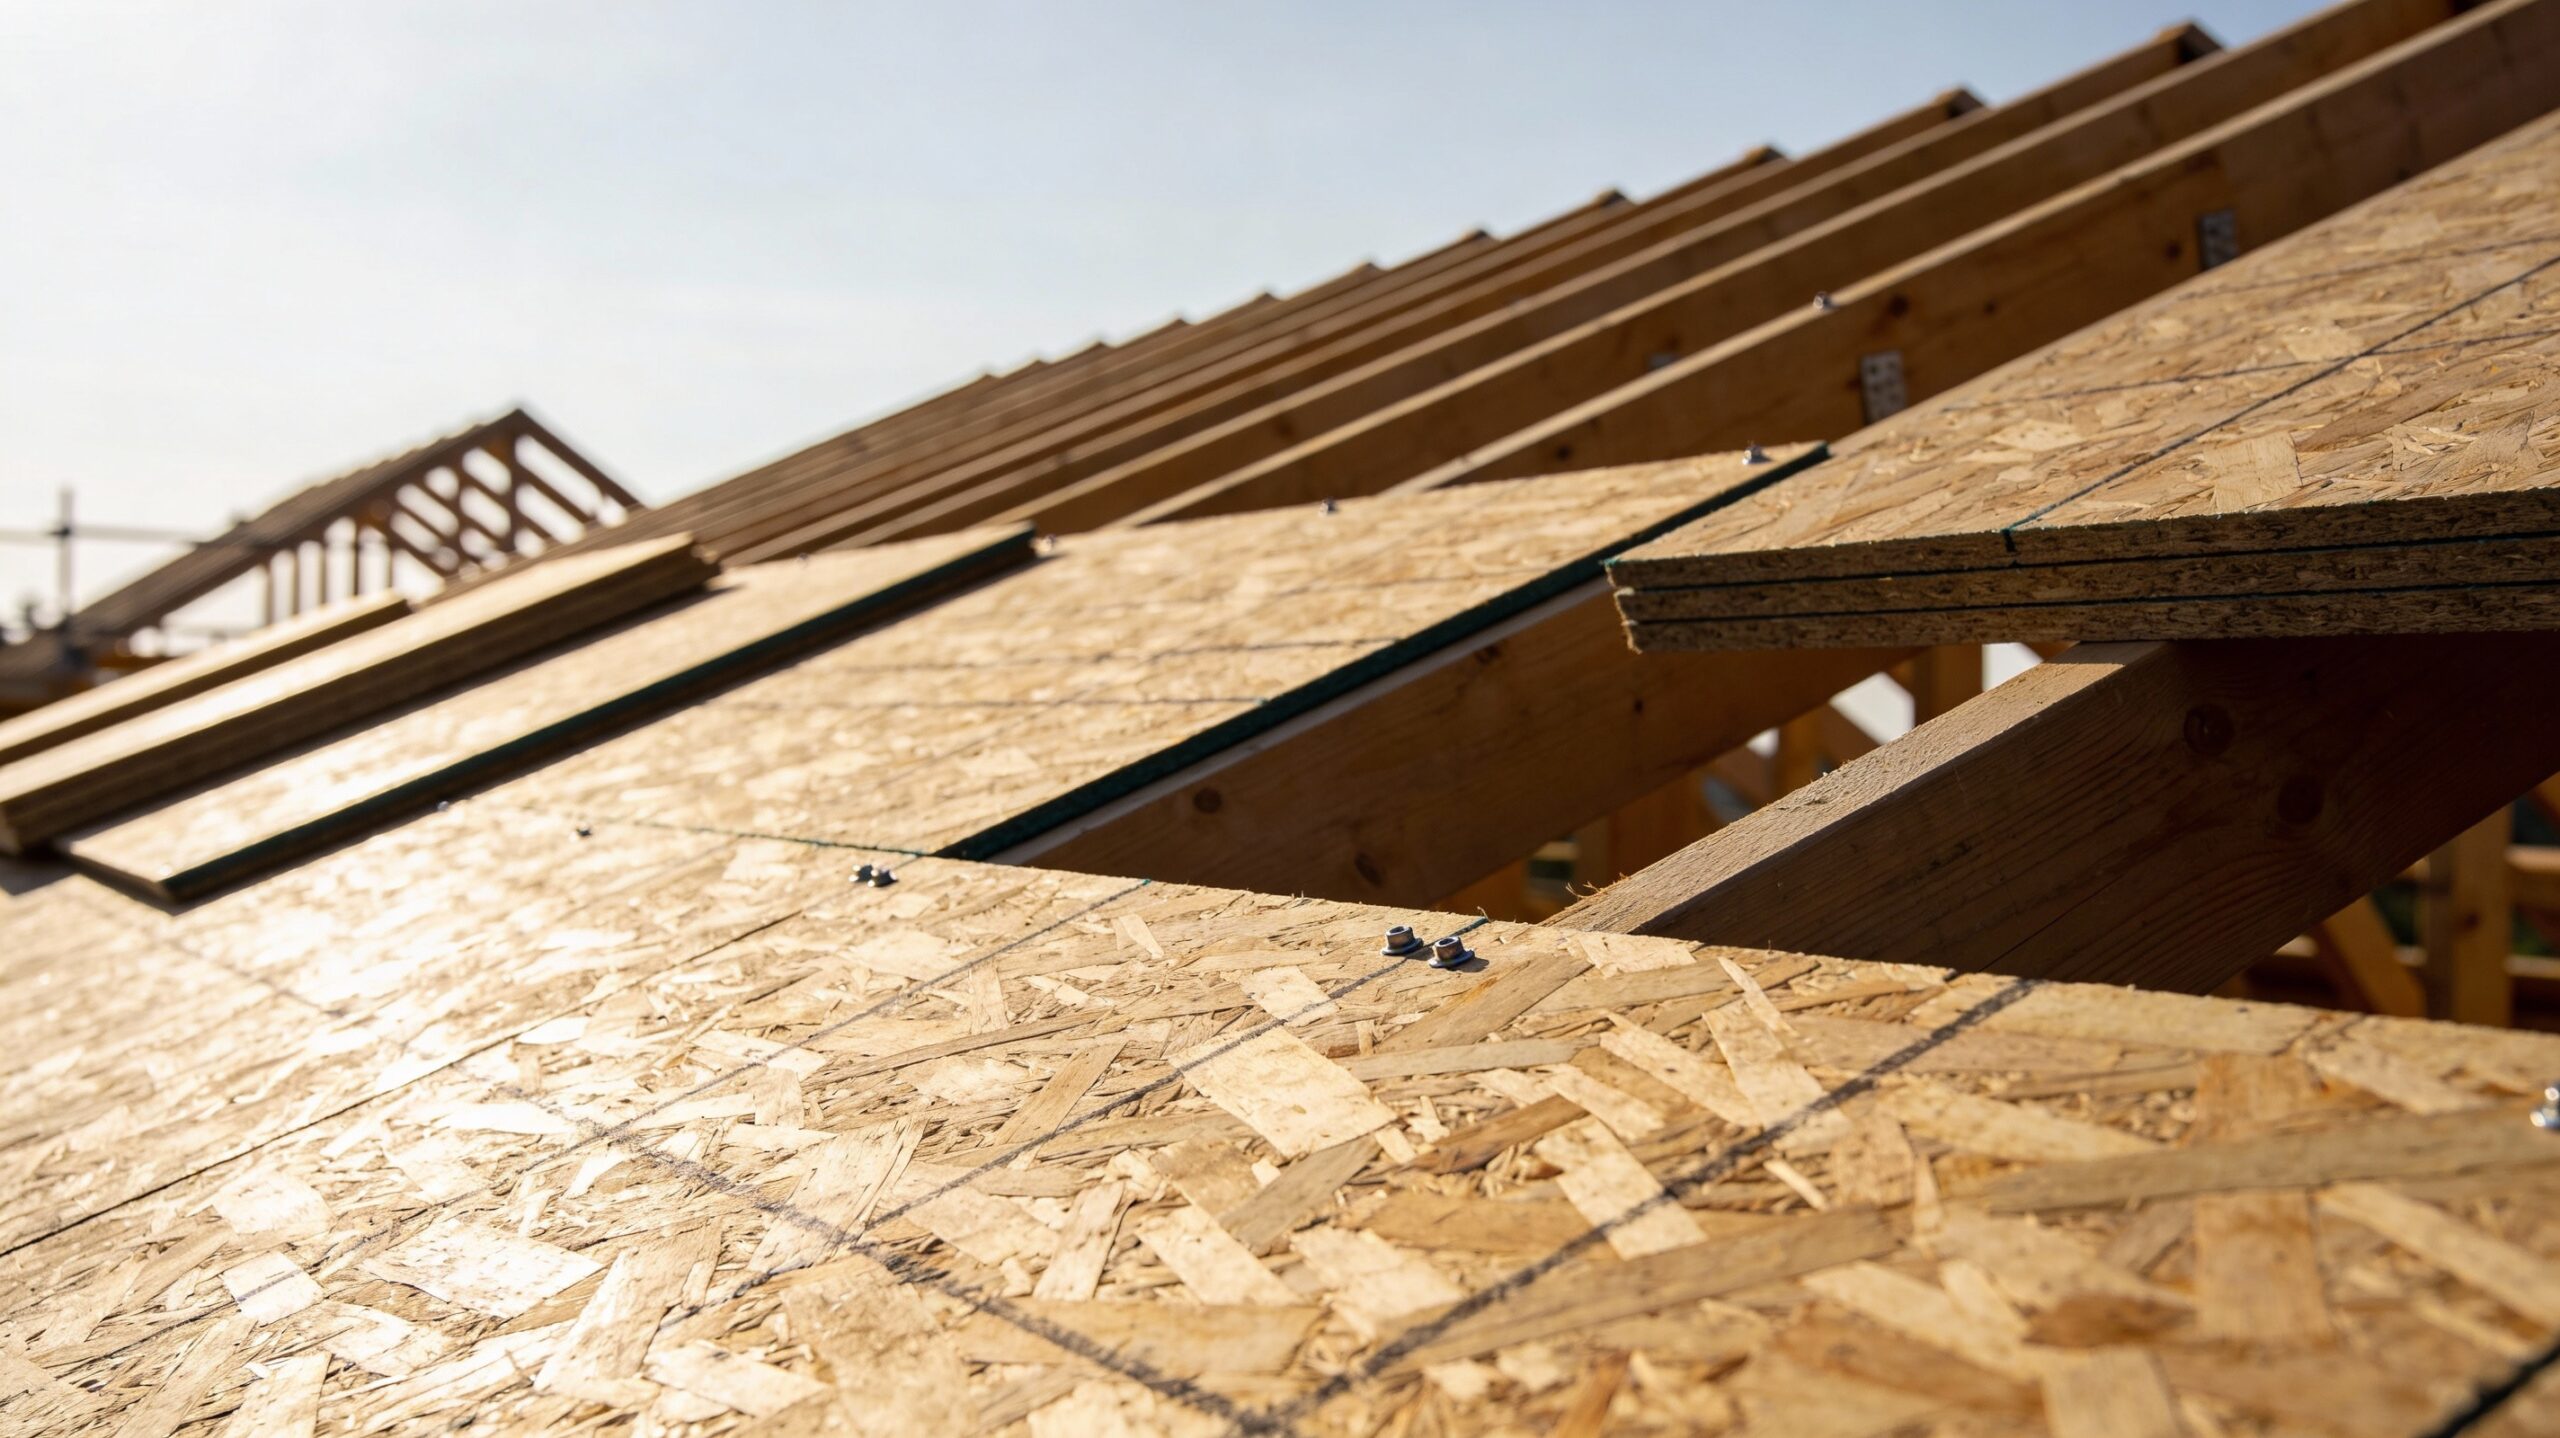
To truly appreciate the engineering behind residential construction, one must look at how loads are distributed. Roof sheathing is the board or sheet material that is fastened directly to the roof rafters or trusses. It creates a solid deck onto which the underlayment and shingles are installed. Without this layer, there would be nothing to nail the shingles to, and the rafters would be prone to twisting or buckling under pressure.
The primary function of roof sheathing is to strengthen the roof assembly. It ties the trusses together, creating a unified diaphragm that resists lateral forces like high winds or seismic activity. When wind hits the side of a house, it pushes against the walls; the sheathing helps transfer that energy through the structure to the foundation, preventing the house from racking or leaning.
Furthermore, this layer acts as a thermal barrier and a second line of defense against moisture. While shingles shed the bulk of the rain, the substrate ensures that any water that gets past the shingles does not immediately enter the attic space.
Choosing the right material for your roof sheathing is not just about code compliance; it is about longevity. Builders must consider the local climate, the weight of the roofing material (slate vs. asphalt), and the span of the rafters. If the sheathing is too thin, it may sag between the rafters, leading to a wavy roof appearance and potential structural failure. If it is not spaced correctly, it can buckle when it expands due to humidity.

Comprehensive Technical Breakdown
In this section, we will delve into the specific definitions and technical requirements necessary for a robust roofing system.
When asking what is roof sheathing, one must define it as the structural skin of the roof, typically made from wood products like OSB (Oriented Strand Board) or plywood, which provides a nailing base for shingles. It is the critical interface between the framing and the weatherproofing. Deciding what sheathing for roof installations is best depends on your budget and climate; while OSB is the industry standard due to cost-efficiency and shear strength, plywood is often preferred in wet climates because it absorbs moisture less readily and dries faster.
The use of plywood roof sheathing remains a popular choice for premium builds. Plywood is constructed from thin layers of wood veneer glued together with adjacent layers having their wood grain rotated up to 90 degrees to one another. This cross-graining reduces the tendency of wood to split when nailed at the edges and reduces expansion and shrinkage, providing improved dimensional stability. Finally, correct roof sheathing thickness is non-negotiable. For rafters spaced 16 inches apart, 1/2-inch CDX plywood is the minimum standard, whereas rafters spaced 24 inches apart typically require 5/8-inch sheathing to prevent sagging and ensure the roof can bear the weight of snow and maintenance workers.
How to Find the Right Materials
Locating high-quality roof sheathing requires more than a simple trip to the nearest big-box hardware store. While large retailers carry standard stock, they may not always have the specific grade or thickness required for specialized roofing projects. For the best results, homeowners and contractors should look toward dedicated lumber yards or building supply companies that specialize in roofing materials.
-
Check Lumber Yards: Professional lumber yards often store their wood in better conditions than general hardware stores, reducing the risk of buying warped or moisture-damaged boards.
-
Verify Grade Stamps: Every panel of roof sheathing will have a stamp indicating its grade, span rating, and exposure durability. Look for “Exposure 1” ratings, which means the wood can withstand temporary exposure to moisture during construction.
-
Consult Roofing Suppliers: Distributors that sell shingles often sell the decking material as well. They can ensure that the sheathing you buy is compatible with the specific roofing system you intend to install.
When searching for materials, it is also vital to inspect the edges of the panels. Roof sheathing that has been stored improperly may have swollen edges, which can create ridges on your finished roof. Always select flat, dry panels with no visible signs of delamination or mold growth. If you are sourcing vintage wood for a restoration project to match board sheathing (common in pre-1950s homes), you may need to visit architectural salvage yards, though most modern codes will allow you to sheet over old boards with new plywood.
Sourcing and Buying Strategies
Knowing how to buy roof sheathing involves calculating the square footage of your roof and adding a waste factor. A common mistake is underestimating the amount of material needed, leading to work stoppages. To calculate the required sheets, divide the total square footage of the roof area by 32 (since a standard 4×8 sheet is 32 square feet), then add 10% to 15% for waste and cutting.
Price fluctuation is a major factor in the lumber market. The cost of roof sheathing can vary weekly based on supply chain issues, wildfires affecting logging, or tariffs. To get the best deal, it is wise to monitor lumber futures or ask your supplier about bulk discounts if you are re-roofing a large property.
It is often beneficial to buy your roof sheathing in a “roofing package” that includes your underlayment, drip edge, and shingles. Suppliers are more likely to offer free delivery or a discount when the entire order is bundled together.
When purchasing, also consider the delivery method. A bundle of 50 sheets of plywood is incredibly heavy. Ensure the delivery truck has a boom lift if you want the materials placed directly onto the roof structure, which saves an immense amount of manual labor. However, verify that your trusses can handle the concentrated load of a full pallet of roof sheathing before landing it on the roof.
Installation Protocols and Best Practices
Learning how to install roof sheathing is a skill that demands precision and adherence to building codes. The installation process generally begins at the bottom edge of the roof (the eaves) and works upward toward the ridge. This allows the installer to stand on the installed sheets as they move up the roof.
Step-by-Step Installation:
-
Preparation: Ensure all rafters are level and secure. If a rafter is bowed, it may need to be planed or sistered to ensure a flat surface for the roof sheathing.
-
Placement: Lay the first sheet horizontally across the rafters. The long edge of the sheet should run perpendicular to the rafters.
-
Spacing: This is the most critical step. You must leave a 1/8-inch expansion gap between all edges of the sheets. Without this gap, the roof sheathing will buckle when it absorbs humidity and expands, creating a “heaved” look on your roof. Many OSB panels come with pre-marked guidelines or tongue-and-groove edges to assist with this.
-
Fastening: Using a pneumatic framing nailer or a hammer, drive 8d common nails through the sheathing into the rafters.
-
Nailing Pattern: Code typically requires nails to be spaced every 6 inches along the edges of the panel and every 12 inches in the field (the center of the panel).
Using H-clips is highly recommended and often required by code for thinner roof sheathing. These small metal clips fit between the panels between the rafters, locking the edges together to allow for load sharing and proper expansion spacing. This prevents the edge of one sheet from sagging below the neighbor when someone walks on it.

Project Duration and Timeline
The question of how long it takes to install roof sheathing depends on the complexity of the roof, the pitch, and the size of the crew. For a standard 2,000-square-foot gable roof with a walkable pitch, a professional crew of three can strip the old roof and install new sheathing in one to two days.
However, if the roof has a steep pitch (requiring harnesses and toe-boards) or features complex valleys, hips, and dormers, the process will take significantly longer. Cutting roof sheathing to fit into valleys requires precise measurements and slows down the workflow.
Weather is the biggest variable. You cannot install roof sheathing in the rain, as trapping moisture inside the wood before covering it with felt can lead to rot.
If you are a DIY enthusiast attempting to install roof sheathing alone, expect the project to take at least three to four times longer than a professional crew. Handling 4×8 sheets of plywood on a sloped surface is physically exhausting and dangerous. Most experts recommend allocating a full week for a DIY re-sheathing project to account for fatigue and slower working speeds.
Cost Analysis and Budgeting
Determining how much roof sheathing costs involves looking at both material and labor. As of current market trends, a single sheet of 7/16-inch OSB can range from $15 to $35, while CDX plywood can range from $25 to $55 per sheet.
What is the cost breakdown?
-
Materials: For a 2,000 sq. ft. roof, you would need roughly 63 to 70 sheets. Using OSB at an average of $20/sheet, the material cost is roughly $1,400. Using plywood at $40/sheet, the cost jumps to $2,800.
-
Labor: Contractors typically charge per square (100 sq. ft.) or per sheet for installation. You might expect to pay between $50 and $80 per sheet for labor, which includes removing old decking (if necessary), hoisting, and nailing.
-
Disposal: If you are removing old, rotted roof sheathing, you must factor in dumpster fees, which can add $400 to $800 to the total project cost.
Therefore, a complete re-sheathing job for an average home can add between $4,000 and $8,000 to the cost of a roof replacement. It is an expensive undertaking, but considering that roof sheathing provides the structural integrity for the entire system, it is a non-negotiable expense if the existing deck is compromised.
Maintenance and Mold Prevention
Many homeowners ask how to clean roof sheathing, but in reality, you generally do not clean the sheathing from the exterior, as it is covered by shingles. Maintenance of sheathing is done primarily from the inside—within the attic. The goal is to keep it dry and ventilated.
If you spot black stains on the underside of your roof sheathing in the attic, it is likely mold or mildew caused by improper ventilation. To “clean” this, you must first fix the source of the moisture. Ensure your soffit vents are not blocked by insulation and that your ridge vent is functioning.
Once ventilation is addressed, you can treat the mold on the roof sheathing using a borate-based solution or a professional mold remediation spray. Do not power wash sheathing inside an attic; this adds more moisture to the wood.
Regular inspections are key. Go into your attic during a heavy rainstorm and use a flashlight to look for dark spots or dripping water on the roof sheathing. Early detection of a leak can save a single sheet of plywood, whereas ignoring it can lead to the rot spreading to the rafters, necessitating a much more expensive structural repair.

Major Advantages of Quality Decking
Investing in high-quality roof sheathing offers numerous advantages that extend beyond simple code compliance. First and foremost is structural rigidity. A roof decked with premium 5/8-inch plywood feels solid underfoot. This is important not just for the roofers, but for anyone who needs to access the roof later, such as chimney sweeps or solar panel installers.
Another advantage is holding power. Shingles are nailed into the roof sheathing. If the sheathing is old, soft, or of poor quality, the nails can back out over time or fail to hold during a windstorm, leading to blown-off shingles. New, dense sheathing grips the nail shank tightly, ensuring the roof covering stays put.
Furthermore, modern roof sheathing often comes with radiant barrier backings. These are foil laminates applied to the underside of the panel that reflect heat away from the attic. This can significantly lower attic temperatures in the summer, reducing the load on your air conditioning system and lowering energy bills.
Challenges and Potential Risks
Despite its benefits, there are challenges connected to roof sheathing. The most prevalent issue is moisture sensitivity. OSB, in particular, is prone to edge swelling if it gets wet during construction. If the roofer does not cover the deck immediately with felt paper, a rainstorm can cause the edges of the roof sheathing to swell permanently. This creates “ghost lines” visible through the asphalt shingles.
Another challenge is delamination in older plywood. Over decades, the glues used in older roof sheathing can break down due to extreme heat cycles in the attic. This results in the layers of wood separating, losing their structural strength.
Finally, fire resistance is a concern. Standard wood roof sheathing is combustible. In wildfire-prone areas, building codes may require chemically treated fire-retardant sheathing or specific assemblies to prevent the roof from igniting if embers land on it or get sucked into the attic vents. These specialized materials are harder to find and more expensive to install.
Comparative Material Analysis
The debate between OSB and plywood for roof sheathing is ongoing. OSB (Oriented Strand Board) is made of wood strands compressed with resin. It is generally more consistent, with no voids or knots, and is cheaper. It is the dominant material in modern tract housing. However, it is heavier than plywood and takes longer to dry if it gets wet.
Plywood, on the other hand, is lighter and stiffer. For roof sheathing, plywood is often considered superior for longevity in wet climates. If plywood gets wet, it swells consistently across the sheet and returns to its original shape when dry. OSB tends to hold moisture in the center and swell permanently at the edges.
When deciding, consult your local building code. Some jurisdictions have specific requirements regarding the nail-pull resistance and shear strength that might favor one type of roof sheathing over the other.
Regardless of the choice, the installation quality matters more than the material. A well-installed OSB roof with proper spacing and ventilation will outlast a poorly installed plywood roof.

Frequently Asked Questions
Does roof sheathing need to be replaced when replacing shingles?
Not necessarily. You only need to replace the roof sheathing if it is rotted, delaminated, or broken. However, a roofer will inspect the deck once the old shingles are removed and recommend replacing any compromised sheets.
Can I put new sheathing over old sheathing?
While physically possible, it is rarely recommended. Adding a second layer of roof sheathing adds significant weight to the structure and can mess up the alignment of your fascia and gutters. It is better to remove the old layer to inspect the rafters properly.
What is the gap between roof sheathing sheets for?
The 1/8-inch gap is an expansion joint. Wood expands and contracts with changes in humidity and temperature. Without this gap, the roof sheathing would push against itself and buckle, causing ridges on your roof.
Is thinner sheathing okay for a garage?
It depends on the rafter spacing. Even for a garage, if the rafters are 24 inches apart, you should use at least 7/16-inch or preferably 5/8-inch roof sheathing to prevent sagging. Do not compromise on thickness to save a few dollars.
How do I know if my roof sheathing is rotten?
Signs include a spongy feel when walking on the roof, sagging sections visible from the ground, or dark water stains and mold growth visible in the attic.
Conclusion
The integrity of your home relies heavily on the quality and condition of your roof sheathing. It is the unsung hero of residential construction, providing the necessary substrate for weatherproofing while tying the entire frame of the house together. Whether you are building a new home or managing a re-roofing project, understanding the nuances of material selection, thickness requirements, and installation protocols is paramount.
From the cost implications of plywood versus OSB to the critical importance of the 1/8-inch expansion gap, every detail matters. Neglecting the condition of your roof sheathing can lead to catastrophic failures, mold growth, and expensive structural repairs down the line. By prioritizing high-quality materials and professional installation, you ensure that your roof remains a durable, safe, and efficient barrier against the elements for decades to come. Always remember that while the shingles may be what you see, the sheathing is what keeps you safe.
🔧 Other Resources
• Bill Ragan Roofing – Educational article explaining what roof sheathing is and its function in roofing systems.
• Home Depot – Retail category page listing plywood roof sheathing products and materials.
• Huber Engineered Woods – Manufacturer page describing ZIP System roof sheathing products and performance features.
• YouTube Video – Video demonstrating roof sheathing installation techniques.
🔎 Other Helpful Articles
• Roof Rats Safe Home – Educational article discussing how roof rats impact homes and prevention considerations.
• How Long Does a Roof Last – Informational guide explaining roof lifespan based on materials and conditions.
• Roof Decking Build – Technical article describing how roof decking is constructed and installed.