roof underlayment: 1 Powerful Way to Stop Leaks
Roof Underlayment: Critical Secret Revealed
Protecting your home starts beneath the surface, and roof underlayment serves as the unsung hero of your roofing system. This critical waterproof or water-resistant barrier sits directly on your roof deck, creating a secondary defense against moisture, wind, and the elements. While shingles or tiles grab the spotlight, roof underlayment works tirelessly behind the scenes to prevent leaks, extend your roof’s lifespan, and maintain structural integrity.
Understanding roof underlayment is essential whether you’re building a new home, replacing an aging roof, or simply wanting to make informed maintenance decisions. This comprehensive guide explores everything from basic definitions to advanced installation techniques. You’ll discover the various types available, learn how to select the right product for your climate, and understand the true costs involved in protecting your most valuable investment.
What Is Roof Underlayment
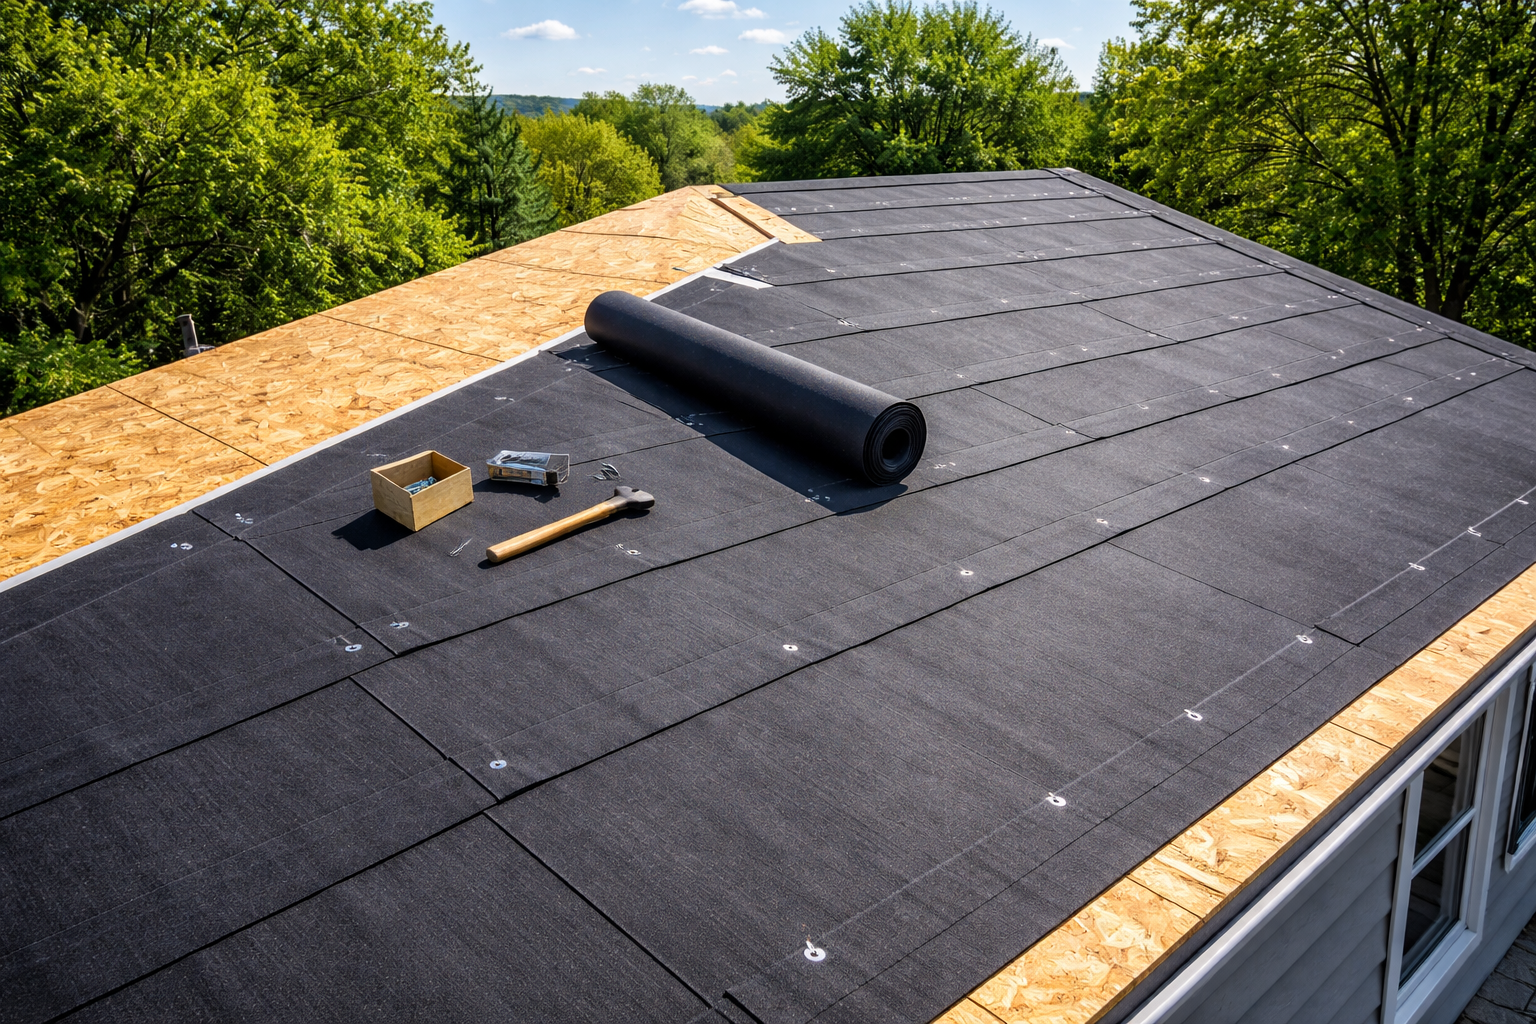
Roof underlayment is a protective layer installed between your roof deck and the exterior roofing material. This barrier prevents water infiltration, blocks wind-driven rain, and provides temporary weather protection during construction. Modern roof underlayment has evolved significantly from traditional felt paper, now incorporating advanced synthetic materials that offer superior performance and longevity.
The primary function of roof underlayment is moisture management. When shingles crack, blow off, or allow water penetration, the underlayment acts as your home’s last line of defense. It channels water away from vulnerable areas, preventing rot in the roof deck and protecting your home’s interior from costly water damage.
Building codes in most regions mandate roof underlayment installation. Requirements vary based on climate, roof pitch, and local weather patterns. Some areas prone to ice dams or severe storms require specific underlayment types with enhanced waterproofing capabilities. Always verify local building codes before starting your roofing project.

Types of Roof Underlayment Materials
Asphalt-saturated felt represents the traditional choice for roof underlayment. Available in 15-pound and 30-pound weights, felt paper has served the construction industry for decades. While affordable, felt tears easily when wet and degrades under prolonged sun exposure. Many contractors still use it for basic applications, but synthetic alternatives have largely replaced felt in demanding environments.
Synthetic roof underlayment has revolutionized roofing protection with its superior strength, durability, and weather resistance. Made from polypropylene or polyethylene, this modern roof underlayment withstands foot traffic, resists tearing, and remains stable in extreme temperatures. Synthetic products typically feature slip-resistant surfaces that enhance worker safety during installation.
Rubberized asphalt underlayment, often called peel-and-stick or self-adhering membrane, provides the highest level of waterproofing. This premium roof underlayment contains a sticky backing that bonds directly to the roof deck, creating an impenetrable seal. It excels in valleys, around chimneys, and along eaves where ice dams commonly form. The enhanced protection comes at a higher price point.
Non-bitumen synthetic underlayment offers an environmentally friendly alternative without petroleum-based materials. These products deliver excellent breathability, allowing trapped moisture to escape while blocking external water. UV resistance makes this roof underlayment ideal for projects where roofing material installation may be delayed.
Synthetic Roof Underlayment Advantages
Synthetic roof underlayment outperforms traditional felt in virtually every measurable category. Its tear strength exceeds felt by 5 to 10 times, preventing rips during installation even in windy conditions. This durability translates to fewer callbacks and repairs for contractors, while homeowners benefit from long-term reliability that protects their investment.
Weather resistance stands as synthetic roof underlayment’s greatest advantage. Unlike felt, which deteriorates when exposed to UV rays for extended periods, synthetic materials maintain integrity for months of sun exposure. This characteristic proves invaluable when construction delays prevent immediate shingle installation. The material won’t wrinkle, buckle, or absorb moisture like felt paper.
Installation efficiency improves dramatically with synthetic roof underlayment. The lightweight rolls are easier to carry and position, reducing labor time and physical strain. Many products feature printed layout lines and measurement markers, ensuring accurate placement and proper overlap. The slip-resistant surface allows workers to move confidently across the roof deck.
Cost considerations initially favor felt, but synthetic roof underlayment delivers superior value over time. While the upfront expense runs 20 to 50 percent higher, the extended lifespan, reduced labor costs, and superior protection justify the investment. Many synthetic products come with warranties of 25 to 50 years, compared to felt’s typical 10 to 15 year lifespan.
How to Install Roof Underlayment
Proper installation begins with a clean, dry roof deck free from debris, protruding nails, and damaged areas. Inspect the entire surface for gaps, cracks, or weak spots that require repair before applying roof underlayment. Replace any damaged sheathing and ensure all fasteners sit flush with the deck surface to prevent punctures.
Start at the lowest point of the roof, typically the eaves. Roll out the first course of roof underlayment horizontally across the roof, allowing a 1/4 to 3/4 inch overhang at the eave and rake edges. This overhang directs water into gutters and prevents moisture from wicking behind fascia boards. Secure the material using cap nails or staples spaced according to manufacturer specifications.
Overlap each subsequent course by at least 2 to 4 inches over the previous layer, creating a shingled effect that channels water downward. Pay special attention to end laps, which should overlap by 6 inches minimum. When installing roof underlayment around penetrations like chimneys or vent pipes, cut the material carefully and seal all edges with compatible roofing cement.
Valley treatment requires extra care since these areas concentrate water flow. Install a center strip of self-adhering roof underlayment first, then overlay with your primary underlayment material. Extend coverage at least 18 inches from the valley centerline on each side. This double-layer approach provides critical protection against leaks in these vulnerable zones.
Ridge and hip installations demand proper overlap to prevent wind-driven rain infiltration. Bring roof underlayment from both sides to meet at the peak, overlapping by at least 6 inches. In high-wind areas, consider using self-adhering products along ridges and hips for maximum security. Never leave roof underlayment exposed for extended periods without topside roofing material.

How to Lay Roof Underlayment Properly
Temperature considerations affect roof underlayment installation significantly. Apply synthetic products when temperatures exceed 40°F to ensure proper adhesion and material flexibility. Cold weather makes synthetic roof underlayment stiff and difficult to handle, while extreme heat can cause premature adhesive activation in self-adhering products. Plan installation during moderate weather conditions whenever possible.
Fastener selection impacts both immediate installation quality and long-term performance. Use plastic cap nails or staples specifically designed for roof underlayment to prevent tearing and provide secure attachment. Space fasteners 12 inches apart along overlaps and 24 inches apart in the field of each sheet. Avoid overdriving fasteners, which can create punctures that compromise waterproofing.
Wrinkle prevention ensures optimal water-shedding performance. Pull roof underlayment taut during installation, but avoid stretching so tightly that the material develops stress points. Smooth out any bubbles or wrinkles before fastening, as these imperfections can trap water and lead to premature deterioration. Work methodically across each course rather than rushing ahead.
Wind protection becomes critical during installation on steep slopes or in exposed locations. Temporarily secure roof underlayment immediately after positioning each course, even if full fastening will follow later. Strong gusts can catch loose material and cause dangerous situations or damage the product. Many contractors install a few rows of shingles immediately after completing each underlayment section.
Metal Roof Underlayment Requirements
Metal roof underlayment differs from standard applications due to unique thermal and condensation challenges. Metal roofing expands and contracts with temperature changes, creating potential for condensation when warm, moist air contacts cold metal surfaces. Select breathable roof underlayment that allows vapor transmission while blocking liquid water to prevent moisture accumulation.
High-temperature synthetic roof underlayment is essential under metal roofing systems. Metal surfaces can reach 150°F or higher in direct sunlight, temperatures that would degrade standard felt products. Look for synthetic materials rated for sustained temperatures of at least 240°F. These specialized products maintain integrity and adhesion despite extreme heat cycles.
Slip-sheet applications protect metal panels from direct contact with certain roof underlayment types. Some synthetic materials contain chemicals that react with metal coatings, causing premature corrosion or discoloration. Installing a breathable slip sheet over your primary roof underlayment creates a buffer layer that prevents chemical interaction while maintaining waterproofing.
Standing seam metal roofs require special consideration for fastener placement. Since these systems use concealed fasteners, your roof underlayment installation must account for the clip locations. Mark fastener lines on the underlayment before installing clips to ensure you don’t accidentally puncture the waterproof barrier. Use self-adhering roof underlayment along eaves and rakes for enhanced protection.
How to Find Quality Roof Underlayment
Research begins with understanding your climate’s specific challenges. Homes in hurricane zones need wind-resistant roof underlayment with high tear strength and superior adhesion. Cold climates require ice-dam protection, particularly along eaves where ice and water backup typically occurs. Hot, sunny regions benefit from UV-resistant products that withstand prolonged exposure.
Manufacturer certifications provide valuable quality indicators. Look for roofing underlayment products that meet or exceed ASTM D226 for felt or ASTM D4869 for synthetic materials. ICC-ES evaluation reports verify that products comply with building code requirements. Many premium manufacturers subject their roofing underlayment to independent testing that exceeds minimum standards.
Contractor recommendations offer real-world insights into roofing underlayment performance. Experienced roofers work with various products and understand which materials deliver reliable results in local conditions. Ask contractors about their preferred brands, installation experiences, and warranty histories. Their practical knowledge often reveals performance differences not apparent from marketing materials alone.
Warranty coverage reflects manufacturer confidence in their roof underlayment products. Standard warranties typically range from 10 to 30 years for synthetic materials, while premium products may offer lifetime coverage. Read warranty terms carefully, noting exclusions, required installation methods, and transferability. Some manufacturers void warranties if their roof underlayment isn’t paired with their approved roofing materials.
How to Buy Roof Underlayment
Calculate material quantities by measuring your roof’s total square footage and adding 10 percent for waste and overlaps. Roof underlayment is sold by the roll, with coverage typically ranging from 1000 to 4000 square feet depending on the product. Account for extra material needed in valleys, around penetrations, and along complex roof features.
Compare prices across multiple suppliers, but don’t let cost alone drive your decision. Big-box home improvement stores offer convenience and competitive pricing on common roofing underlayment types. Specialized roofing supply houses stock professional-grade products and provide expert advice. Online retailers may offer lower prices but factor in shipping costs for heavy materials.
Purchase timing affects both availability and pricing. Spring and early summer represent peak roofing season when demand drives prices higher and stock depletes quickly. Consider buying roofing underlayment during winter months when suppliers offer discounts to move inventory. However, ensure proper storage conditions if purchasing far in advance of installation.
Bundled purchases may yield significant savings. Some manufacturers offer package deals when buying roof underlayment, shingles, and accessories together. Contractors with established supplier relationships often negotiate better rates than individual homeowners. If hiring a professional, ask whether they can source materials at trade prices and pass savings along.
How Much Does Roof Underlayment Cost
Material costs for roof underlayment vary widely based on type and quality. Standard 15-pound felt runs approximately $0.15 to $0.30 per square foot, making it the most economical option. Thirty-pound felt costs slightly more at $0.25 to $0.40 per square foot. These prices reflect material only, not installation labor.
Synthetic roofing underlayment typically costs between $0.40 and $0.80 per square foot for mid-range products. Premium synthetic materials with enhanced features may reach $1.00 to $1.50 per square foot. While more expensive than felt, synthetic roofing underlayment often proves more cost-effective when factoring in durability, installation efficiency, and long-term performance.
Self-adhering rubberized asphalt roofing underlayment represents the premium tier, costing $1.50 to $3.00 per square foot. These products are typically used selectively in vulnerable areas rather than across entire roofs. Ice and water shield applications along eaves and valleys might add $500 to $1500 to total project costs.
Installation labor adds significantly to overall expenses. Professional contractors charge $1.00 to $2.50 per square foot for roofing underlayment installation, depending on roof complexity, accessibility, and regional labor rates. A typical 2000-square-foot roof might incur $2000 to $5000 in labor costs. Steep slopes, multiple penetrations, and complex designs increase labor requirements.
How Long Does Roof Underlayment Last
Lifespan expectations for roof underlayment depend heavily on material type and installation quality. Traditional felt paper typically lasts 10 to 20 years under normal conditions, though exposure to moisture accelerates deterioration. Once covered by shingles, felt performs adequately for its expected service life but offers little margin for error.
Synthetic roof underlayment delivers 25 to 50 years of reliable performance when properly installed. These materials resist degradation from moisture, temperature extremes, and UV exposure. Many manufacturers warranty premium synthetic roof underlayment for 30 years or longer. In practice, high-quality synthetic products often outlast the roof covering they protect.
Self-adhering roofing underlayment provides exceptional longevity, with some products rated for 50 years or more. The rubberized asphalt composition remains flexible and waterproof throughout its service life. This durability makes self-adhering materials ideal for critical areas where leaks would cause severe damage. The premium cost translates to decades of worry-free protection.
Environmental factors significantly impact roofing underlayment lifespan. Extreme temperature cycles, intense UV exposure, and persistent moisture challenge even the best materials. Coastal environments with salt air and high humidity demand more durable roof underlayment than moderate inland climates. Consider your local conditions when selecting products and setting performance expectations.
How to Clean and Maintain Roof Underlayment
- Direct cleaning of roof underlayment rarely occurs once the final roofing material covers it. However, during installation or if exposed due to damage, gentle cleaning prevents contamination that could compromise adhesion. Use a soft broom to remove debris, avoiding aggressive scrubbing that might damage the surface. Never pressure wash roofing underlayment, as high-pressure water can tear the material or force moisture beneath it.
- Inspection routines should include checking for underlayment exposure after severe weather events. Strong winds occasionally lift shingles or damage roofing materials, exposing the underlying barrier. If you notice visible roof underlayment, address repairs immediately. Prolonged UV exposure degrades even synthetic materials, reducing their effectiveness and potentially voiding warranties.
- Attic inspections reveal underlayment condition from below. Look for water stains, moisture accumulation, or visible light penetrating through the roof deck. These signs indicate compromised roofing underlayment that requires professional evaluation. Dark stains on decking boards often signal long-term moisture problems that may have damaged both underlayment and structural components.
- Maintenance focuses primarily on preserving the roofing materials that protect your roofing underlayment. Keep gutters clean to prevent ice dam formation, which can force water beneath shingles and stress the underlayment. Trim overhanging tree branches that drop debris and retain moisture on your roof. Regular roof cleaning removes moss, algae, and accumulated organic matter that can trap moisture.

Advantages and Challenges of Roof Underlayment
Waterproofing benefits represent the primary advantage of quality roof underlayment. This critical layer prevents water infiltration even when primary roofing materials fail, protecting your home’s structure and interior. Advanced synthetic roof underlayment offers superior water resistance compared to traditional felt, handling heavy rainfall and wind-driven precipitation that might overwhelm lesser barriers.
Fire resistance varies significantly among roof underlayment types. Synthetic products typically achieve Class A fire ratings, the highest classification available. This fire resistance provides crucial protection in wildfire-prone regions, potentially preventing ember penetration that could ignite your home. Some felt products also achieve Class A ratings when properly manufactured and installed.
Installation challenges include weather sensitivity and proper technique requirements. Applying roofing underlayment in wind, rain, or extreme temperatures complicates installation and may compromise performance. Incorrect fastener spacing, inadequate overlaps, or poor seam sealing creates vulnerabilities that defeat the underlayment’s purpose. Professional installation ensures proper techniques and optimal results.
Cost considerations present challenges for budget-conscious projects. Premium synthetic roof underlayment and self-adhering products significantly increase material expenses. However, this upfront investment delivers long-term value through extended lifespan, reduced maintenance, and superior protection. Balancing immediate costs against lifetime benefits requires careful evaluation of your specific circumstances.
Compatibility issues may arise when pairing certain roof underlayment types with specific roofing materials. Some metal roofing manufacturers void warranties if incompatible underlayment is installed. Asphalt shingles may not adhere properly to certain synthetic surfaces. Always verify manufacturer recommendations for underlayment compatibility before purchasing materials.

Frequently Asked Questions
Can I install roof underlayment myself?
DIY installation is possible for experienced homeowners with proper safety equipment and roofing knowledge. However, professional installation ensures correct techniques, proper overlap, and compliance with building codes. Mistakes in roof underlayment installation can lead to leaks, warranty voidance, and costly repairs.
What happens if roof underlayment gets wet during installation?
Synthetic roof underlayment handles moisture exposure well and dries without damage. Traditional felt absorbs water, becomes heavy, and may wrinkle or tear when wet. If felt gets soaked, allow complete drying before continuing installation. Never install final roofing materials over saturated underlayment.
How do I know which weight of felt underlayment to use?
Fifteen-pound felt suffices for low-slope roofs and basic applications. Thirty-pound felt provides better durability and tear resistance for steep slopes and high-traffic installation. Check local building codes for minimum requirements. Many professionals now choose synthetic roof underlayment over felt regardless of application.
Is roof underlayment required by building codes?
Most building codes require roof underlayment for residential construction. Requirements vary by region, with some areas mandating specific types for certain roof pitches or climate conditions. Ice and water shield may be required along eaves in cold climates. Always verify local code requirements before starting your project.
Can I use roofing felt as underlayment for metal roofs?
While possible, roofing felt is not ideal under metal roofing. High temperatures generated by metal panels degrade felt quickly. Breathable synthetic roof underlayment specifically designed for metal applications provides superior performance. Consult metal roofing manufacturers for their recommended underlayment products.
How much overlap is required when installing roof underlayment?
Horizontal laps should overlap by 2 to 4 inches minimum, with the upper course covering the lower. End laps require 6 inches of overlap. Valley applications need 18 inches of overlap on each side of the centerline. Follow manufacturer specifications, which may require greater overlaps in certain conditions.
Conclusion
Roof underlayment serves as your home’s essential defense against water damage, working silently beneath shingles, tiles, or metal panels to protect your investment. Understanding the various types available, from traditional felt to advanced synthetic materials, empowers you to make informed decisions that balance cost, performance, and longevity. Whether you’re building new construction or replacing an aging roof, selecting appropriate roof underlayment for your climate and roofing system ensures decades of reliable protection.
Professional installation remains critical for maximizing roof underlayment effectiveness. Proper techniques, correct overlaps, and careful attention to vulnerable areas like valleys and penetrations make the difference between adequate protection and premium performance. While DIY installation appeals to skilled homeowners, the complexity and importance of this hidden layer often justify professional expertise.
🔧 Other Resources
• Home Depot – Retail category page listing roofing underlayment products and material options.
• Owens Corning – Educational article explaining how roofing underlayment protects homes from moisture and weather.
• Lowe’s – Retail page presenting roofing underlayment products for residential applications.
• NACHI – Technical resource describing different types of roofing underlayment and their functions.
🔎 Other Helpful Articles
• How Long Does a Roof Last – Informational guide explaining roof lifespan based on materials and environmental factors.
• Roof Decking Build – Technical article outlining how roof decking is constructed and installed.
• Roof Sheathing – Educational article explaining roof sheathing materials and their role in roofing systems.