Rv Roof Repair Kit: Best Ways To Fix Leaks Fast
Rv Roof Repair Kit: Cheap Hacks For Huge Savings
Owning a recreational vehicle offers the freedom to explore the open road, but it also comes with the responsibility of maintenance. One of the most critical aspects of maintaining your rig is ensuring the roof remains watertight. A high-quality rv roof repair kit is an essential tool for every owner. Whether you are dealing with a small tear from a low-hanging branch or significant wear and tear from years of sun exposure, having the right supplies on hand can save you thousands of dollars in water damage repairs.
Many owners underestimate the importance of regular roof inspections until water starts dripping onto their dashboard or bed. By that time, the damage is often extensive. Investing in an rv roof repair kit allows you to address issues immediately, preventing mold growth and structural rot. These kits are designed to be user-friendly, meaning you do not need to be a professional mechanic to use them effectively.
Understanding what goes into a kit and how to use it properly is the first step toward long-term vehicle health. We will explore everything you need to know about selecting and using an rv roof repair kit to keep your adventures dry and enjoyable. From identifying the type of roof you have to the final application of sealant, this guide covers it all.
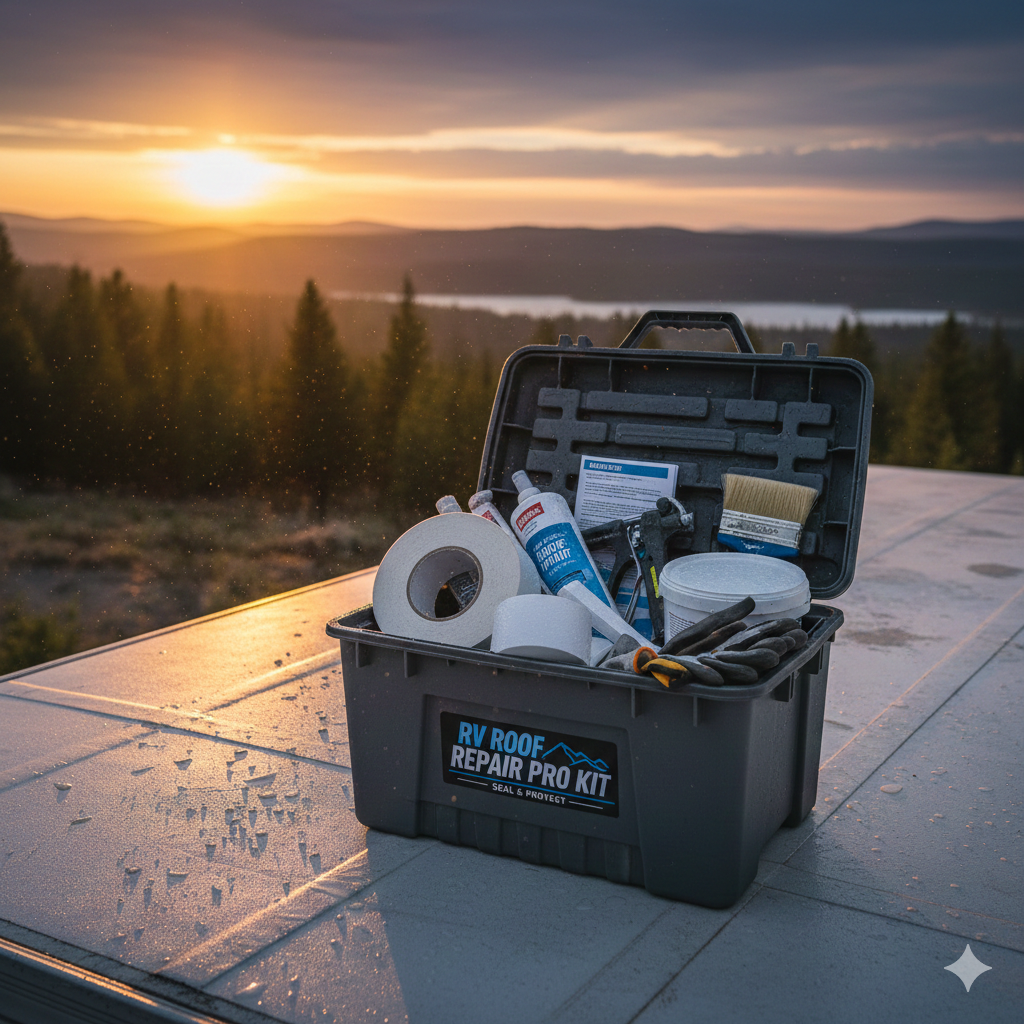
What Is Included In A Standard Kit
An rv roof repair kit is a package of materials specifically curated to patch, seal, and protect the roof of a recreational vehicle. While contents vary by brand and intended use, most kits are designed to provide a permanent solution to leaks. The primary goal is to create a watertight barrier that can withstand the rigors of travel, including vibration, wind, and fluctuating temperatures.

How To Do A Proper Inspection
Before you even open your rv roof repair kit, you must conduct a thorough inspection to locate all potential leak points. Start by safely climbing onto the roof. If your rig does not have a built-in ladder, ensure you use a sturdy extension ladder. Walk carefully, as some roofs are not fully walkable; in those cases, use pieces of plywood to distribute your weight.
Look for cracks in the existing sealant around vents, skylights, and air conditioning units. These are the most common failure points. Even a hairline fracture can admit a surprising amount of water. If you spot a tear or a bubble in the membrane, mark it with a piece of painters tape so you can easily find it when you return with your rv roof repair kit.
How To Find The Right Product
Finding the correct rv roof repair kit requires knowing your roof material. The two most common types are EPDM (Ethylene Propylene Diene Monomer) and TPO (Thermoplastic Olefin). EPDM feels like a rubber inner tube and tends to chalk over time, while TPO has a texture more like an orange peel and is generally shiny. Fiberglass and aluminum roofs are also common on older or higher-end models.
-
Check your owner’s manual to confirm the roofing material.
-
Visit online forums or manufacturer websites to see recommended products.
-
Read reviews from other owners who have used a specific rv roof repair kit.
You can find these kits at local dealership parts counters, large camping supply stores, or online marketplaces. When searching, pay attention to the compatibility labels. A generic product might claim to work on everything, but a specialized rv roof repair kit often provides a longer-lasting bond.
How To Buy With Confidence
When you are ready to buy an rv roof repair kit, do not just look at the price tag. Consider the age of the product. Sealants and adhesives have shelf lives. If you buy a kit that has been sitting in a warehouse for five years, the adhesive might be dried out. Always check the manufacturing date or expiration code on the packaging.
Look for warranties. Reputable manufacturers stand behind their products. If an **rv roof repair kit** fails within a few months of proper application, you want to be able to get a replacement or a refund. Customer support is also crucial; having a number to call if you get stuck during the installation process can be a lifesaver.
Consider the quantity you need. If you are resealing an entire 30-foot trailer, a small patch kit will not be enough. You might need a bulk **rv roof repair kit** or multiple units. Calculate the linear footage of seams you need to cover to ensure you buy enough material in one go.
Camper Rubber Roof Repair Kits And Installation Costs
When discussing specific needs, camper rubber roof repair kits are among the most sought-after items because rubber roofs are so prevalent. These roofs are durable but susceptible to tearing from tree branches. A standard camper roof repair kit usually focuses on membrane patches and specialized adhesive that chemically bonds to the rubber.
How Much Maintenance Is Required
Once you have applied an rv roof repair kit, the work is not entirely over. Maintenance is an ongoing process. You should inspect the repair patches every six months, or before and after every major trip. Check for any lifting at the edges of the patch or cracking in the sealant.
Sun exposure is the enemy of all adhesives. Even the best **rv roof repair kit** will eventually degrade under constant UV radiation. If you store your vehicle outdoors uncovered, you may need to touch up the repairs sooner than if it were stored in a garage.
Keeping the roof clean also extends the life of the repair. Dirt and debris can work their way under sealant edges. By washing the roof regularly, you ensure that the **rv roof repair kit** continues to perform as intended. This proactive approach prevents small issues from becoming major leaks.

How Long The Repair Will Last
The longevity of a repair depends heavily on the quality of the rv roof repair kit and how well the surface was prepared. A quick patch job over a dirty surface might only last a few weeks. However, a properly installed patch using a high-grade rv roof repair kit can last for years, sometimes even outlasting the surrounding roof material.
Many modern tapes included in a premium **rv roof repair kit** are rated for 10 to 15 years of service. Liquid coatings can also provide five to ten years of protection. However, these estimates assume ideal conditions. Real-world travel, with its vibrations and twisting chassis, puts stress on every seal.
If you notice a repair starting to fail, do not wait. You can often apply a fresh layer of sealant or a new patch from an **rv roof repair kit** directly over the old one, provided the old material is clean and stable. Monitoring the repair is key to longevity.
How To Install The Kit Step-By-Step
Using an rv roof repair kit is a straightforward process if you follow the steps carefully. The most critical phase is preparation. If you skip cleaning, the adhesive will bond to the dirt, not the roof.
-
Clean the Area: Use a non-petroleum-based cleaner to remove dirt, oxidation, and old wax. Acetone is often recommended for final prep, but check your kit’s instructions.
-
Remove Old Sealant: If the old caulk is loose, scrape it away carefully with a plastic scraper to avoid gouging the membrane.
-
Measure and Cut: Cut the patch or tape from your rv roof repair kit to size, allowing for at least two inches of overlap on all sides of the damage.
-
Peel and Stick: Remove the backing liner. Apply the tape or patch slowly to avoid air bubbles. Press down firmly.
-
Seal the Edges: Use the self-leveling lap sealant provided in your rv roof repair kit to cover the edges of the patch. This creates a secondary barrier against water intrusion.
Allow the repair to cure. Most kits require 24 hours before the vehicle is exposed to rain, though some modern adhesives in an rv roof repair kit seal instantly.
How To Clean Up Afterward
Roof repair can be messy. Sealants are sticky and can get on your hands, clothes, and tools. Keep a rag and some mineral spirits or the recommended solvent handy while working with your rv roof repair kit. If sealant gets on your skin, wipe it off immediately before it cures.
Dispose of the backing strips and empty tubes responsibly. The chemical components in an rv roof repair kit should not be left in nature. If you used a scraper or scissors, clean the blades thoroughly so they are ready for the next use.
Inspect the roof area one last time to ensure no tools were left behind. A forgotten screwdriver can become a dangerous projectile when you drive away. Stowing your leftover rv roof repair kit materials in a cool, dry place ensures they remain usable for future touch-ups.
What Is The Cost Of Neglect
To understand the value of an rv roof repair kit, you must understand the cost of ignoring the problem. Water damage is insidious. It travels inside walls, rotting wood framing and delaminating fiberglass long before you see a stain on the ceiling. By the time the damage is visible, the repair bill often exceeds several thousand dollars.
Replacing a full roof can cost between $4,000 and $8,000 depending on the size of the rig. Compare that to the $50 or $100 price of a quality rv roof repair kit. The math is simple. Regular maintenance with a kit is an insurance policy for your wallet.
Furthermore, water damage significantly lowers the resale value of the vehicle. A savvy buyer will spot signs of leaks immediately. Being able to show that you maintained the seals with an rv roof repair kit demonstrates responsible ownership and preserves the asset’s value.
Advantages And Challenges Of These Kits
There are distinct advantages to keeping an rv roof repair kit on board. The primary benefit is independence. You do not have to wait for a service appointment or pay high labor rates. You can fix a leak the moment it happens, even if you are boondocking in the middle of nowhere. The peace of mind provided by an rv roof repair kit is invaluable.
Can I use a household silicone sealant instead of an rv roof repair kit?
No, household silicone often does not adhere well to RV roofing materials like EPDM and TPO. It can also peel off due to the vibration of the vehicle. An rv roof repair kit contains specialized sealants designed to flex and bond specifically with RV materials.
How often should I inspect my roof for potential repairs?
It is recommended to inspect your roof at least twice a year and after any severe storms. If you spot any cracking or peeling, use your rv roof repair kit immediately. Regular inspections catch small problems before they require major reconstruction.
Is it necessary to remove the old sealant before using the kit?
If the old sealant is loose, cracked, or failing, it should be removed. However, if the old sealant is firmly attached, you can often clean it and apply the tape or sealant from your rv roof repair kit directly over it. Always check the manufacturer’s instructions for the best results.
Will the patch from the kit withstand highway speeds?
Yes, if applied correctly. The adhesives used in a high-quality rv roof repair kit are designed to withstand wind resistance at highway speeds. Ensuring the surface is clean and the edges are sealed is crucial for the patch to hold during travel.
Can I apply the repair kit while the roof is wet?
Generally, no. Most adhesives require a dry surface to bond effectively. However, there are some emergency rv roof repair kit products designed for wet application, but they are usually temporary fixes. For a permanent repair, always wait for the roof to be dry.

Conclusion
Maintaining a watertight vehicle is the most important aspect of RV ownership, and having a reliable rv roof repair kit is the cornerstone of that maintenance. We have covered the essentials of what these kits are, how to inspect your vehicle, and the step-by-step process of installation. Whether you are dealing with a rubber, fiberglass, or metal roof, there is a solution available that fits your needs.
By proactively using an rv roof repair kit, you save money, extend the life of your camper, and ensure that your travels are not interrupted by water damage. Do not wait for a rainy day to think about your roof. Purchase a quality rv roof repair kit today, perform your inspection, and enjoy the peace of mind that comes with a secure, leak-free adventure. Your RV is your home away from home; protect it with the right tools and attention it deserves.
🔧 Other Resources
• Tough Tech Coatings – Tough Roof RV Full Coat – Product page describing a full-coat RV roof coating system designed for protection and durability.
• Lippert – RV Roof Repair Kits – Manufacturer page listing RV roof repair kits and maintenance products.
• Dicor Products – PatchIt Roof Repair Kit – Product page detailing a PatchIt roof repair kit for RV roof maintenance.
• Amazon – RV Roof Repair Kit – Marketplace search results showing RV roof repair kits and related accessories.
🔎 Other Helpful Articles
• Roof Replacement Estimate – Informational article outlining factors that influence roof replacement cost estimates.
• Roof Ridge Vent – Educational article explaining roof ridge vents and their purpose in ventilation.
• Metal Roof Ice Dam – Informational article describing how ice dams affect metal roofing systems and prevention tips.